Burr puzzle
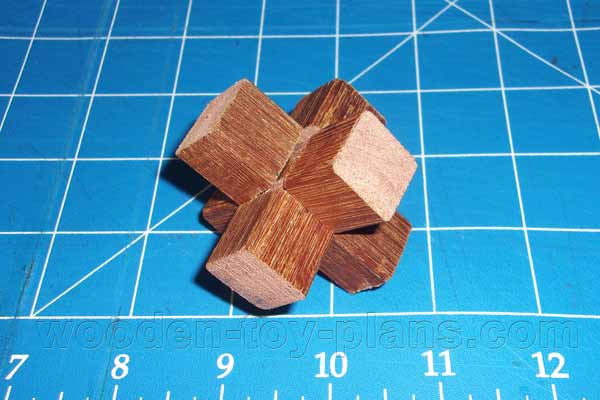
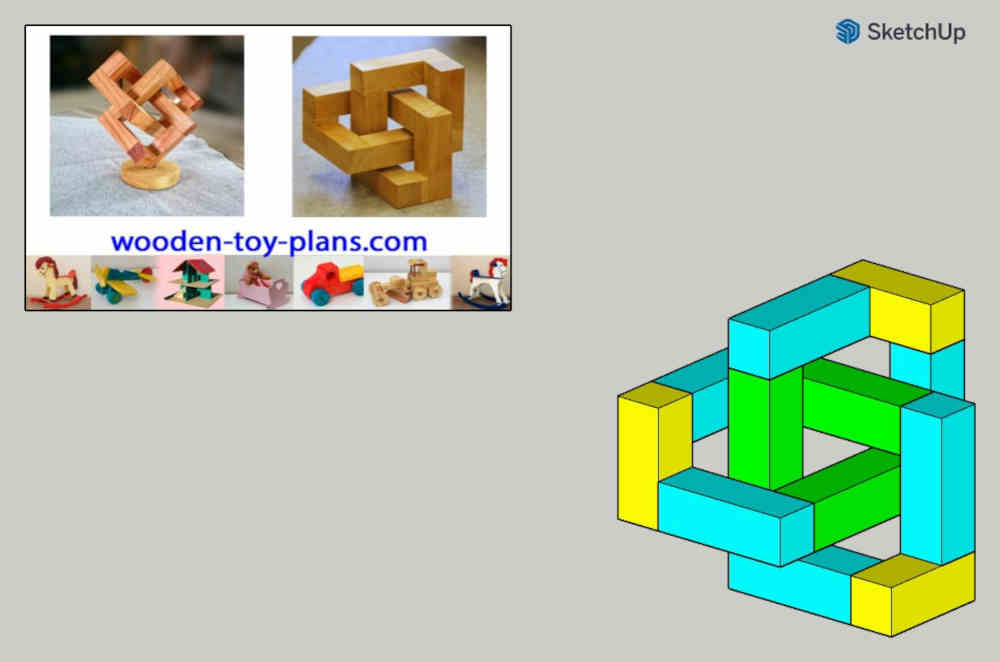
This is my first attempt at making a burr puzzle.
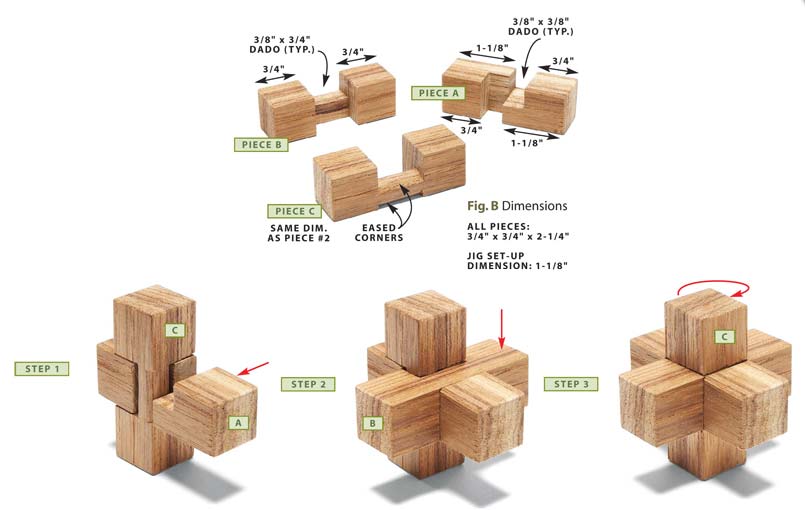
The book that I found Making-Wooden-Toys-and-Gifts-21-Step-by-Step-Projects-By-Popular-Woodworking uses a table saw and dado blade to cut out the notches.
The instructions show how to make them using a table saw. I don't have one, so I made this one using a tenon saw and a miter box.
To be effective, the interlocking puzzle pieces should slide easily, but a fit that is too loose.
Materials
To make this puzzle, I used 19mm square dark maple. If you have a hard wood with a distinctive grain, that would give this burr puzzle a more interesting appearance.
Tools
This is a list of tools that I used:
- Tenon saw
- Marking guage
- Try square
- 16mm chisel
- 6mm chisel
- Square and flat files
- Miter box (home made)
- Clamp
- Vernier calipers
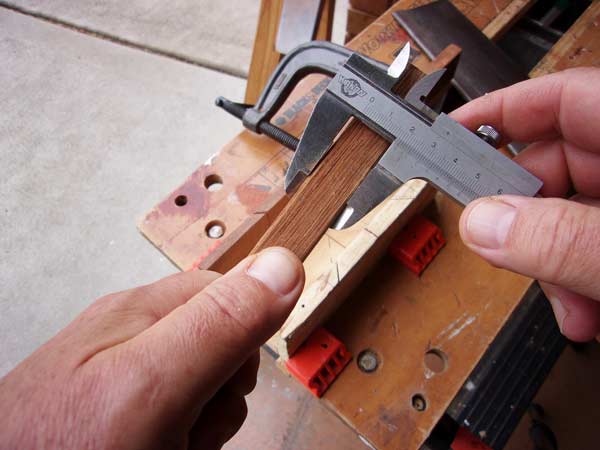
Vernier calipers are normally used in metalwork, it helped me with making accurate cuts and getting the right fit. Perhaps we can call it the Goldilocks fit, not too tight, not too loose, just right.
Once you have made one of these burr puzzles, you will know what I mean.
Download Burr Puzzle plans
You can save the image to your device or download a PDF copy of the 3 piece burr puzzle.
Instructions
This is how I made the 3 piece burr puzzle. You may like to follow these instructions or make it a slightly different way.
There are always certain challenges with any project, and it is always good to see how someone else has met these challenges.
For example, I am using 19mm square project timber from my local hardware supplier.
Turns out that the timber is slightly thicker in one dimension, so I had to make slight adjustments.
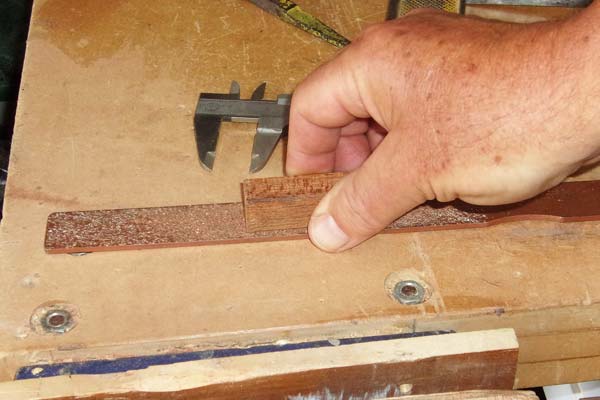
I find it easier to make incremental adjustments using a rough file or sandpaper.
Laying it flat on the workbench, and rubbing the work-piece back and forward, checking the fit with the calipers.
Miter box setup
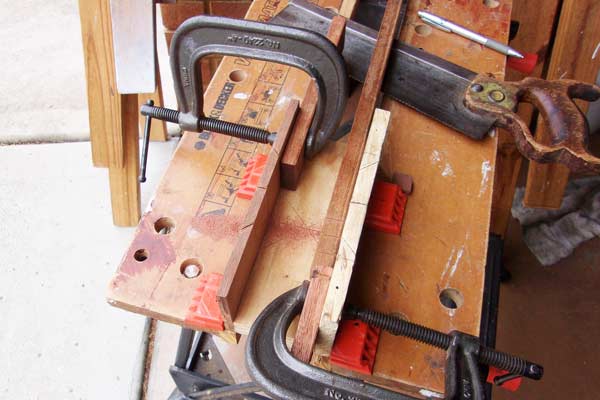
This is my set-up with the miter box.
Taking advantage of the fact that there is two sides, I have clamped a stop at 2 unit lengths on one side, and 3 unit lengths on the other side.
Also have an extra piece half of a unit length to cut the grooves that are half the width.
To test the setup, I cut a test piece. The length of the test piece will determine the fit of the groove.
So, I cut the length on the side that is 3 units long.
The idea is to cut a groove and test the fit. It should be able to slide easily without being too loose or too tight.
Going over to the other side, where the set-up is 2 unit lengths, cut a slot about 1/3 deep on each end, remove the waste with a 16mm chisel, and test the fit.
In this instance, it was a bit too loose, so I made an adjustment to the stop.
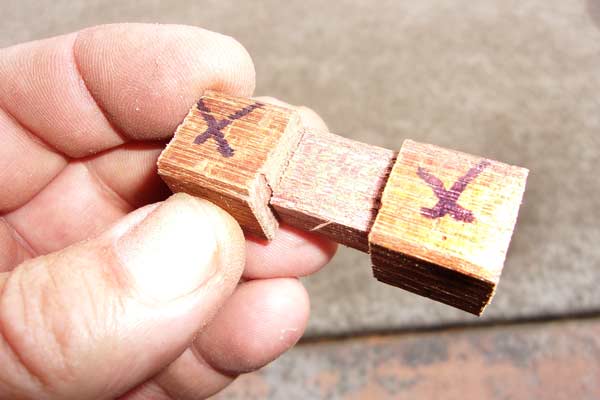
Rather than waste this test piece, I cut another groove on the adjacent face, until I was happy with the fit.
A masterpiece
In the photo, I have marked the side that fits best. Now I have a what could be called a master piece, which is what I will use to match the rest of the pieces.
One more piece is important in this project, a piece that is half the thickness of the material, used in cutting the slots in the piece marked "A."
I use this piece in the miter box set-up to cut the dadoes to half the width.
Six Piece Burr Puzzle
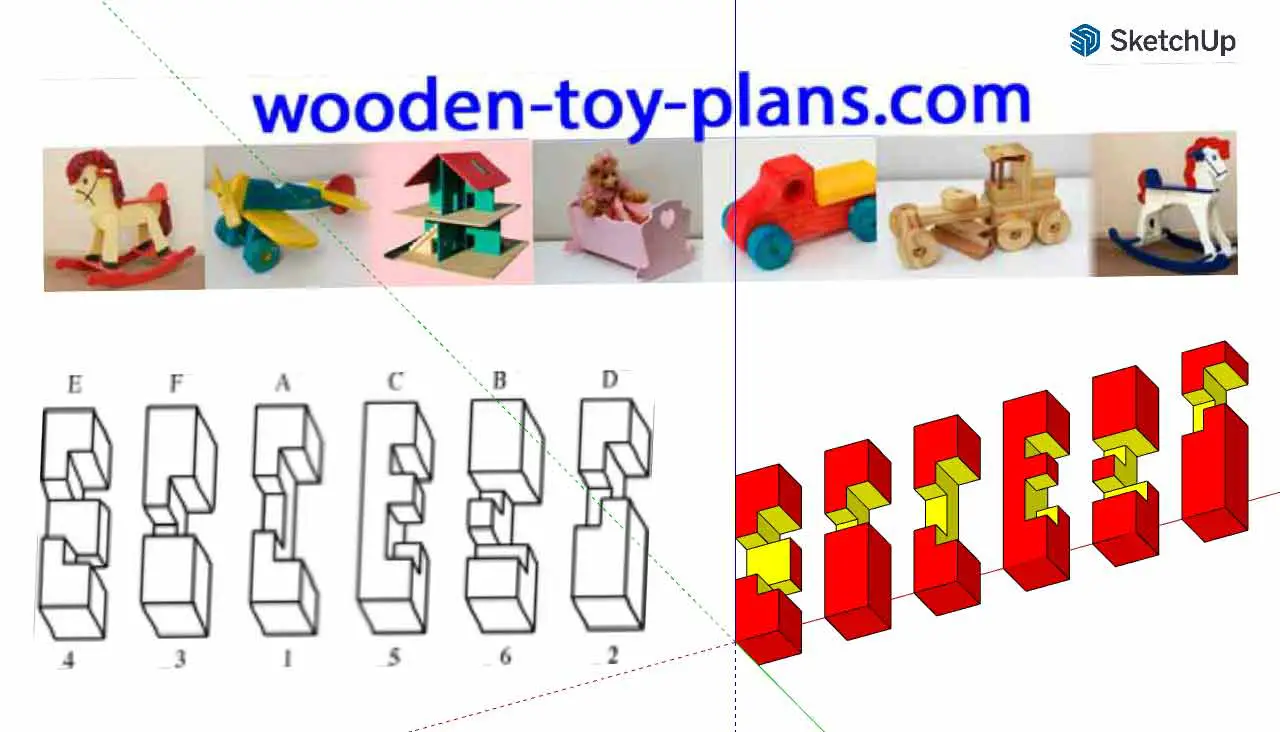
How to make a 6 piece burr puzzle.
The dimensions I have shown here are for reference. When I get the time to make one, I shall in all likelihood make it 3 times larger.
For example, consider the dimensions as units rather than millimeters. The puzzle is based on a cube 10 x 10 x 10 units.
Thus the notches are formed as multiples of 5 units. The overall length of all the parts is 4 units of 10mm.
Lets say I think that I would make the puzzle 3 times larger.
I would cut 6 pieces 30mm square by 120mm long, and cut the notches accordingly.
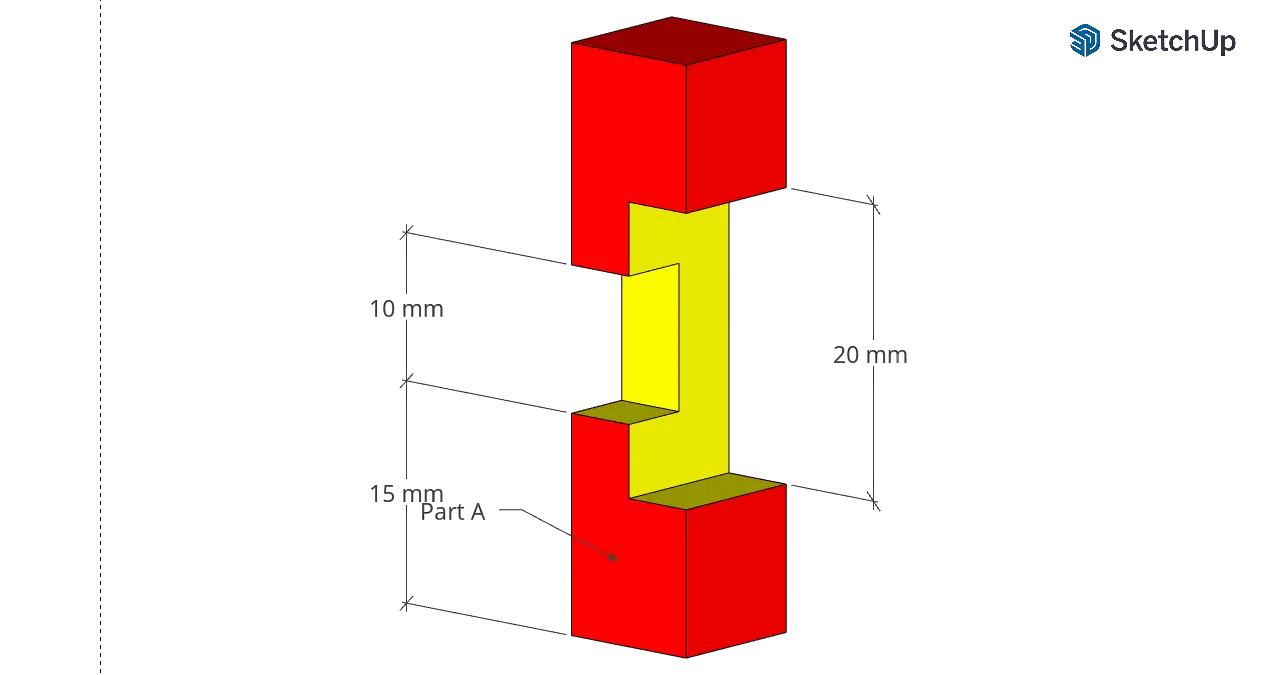 Part A
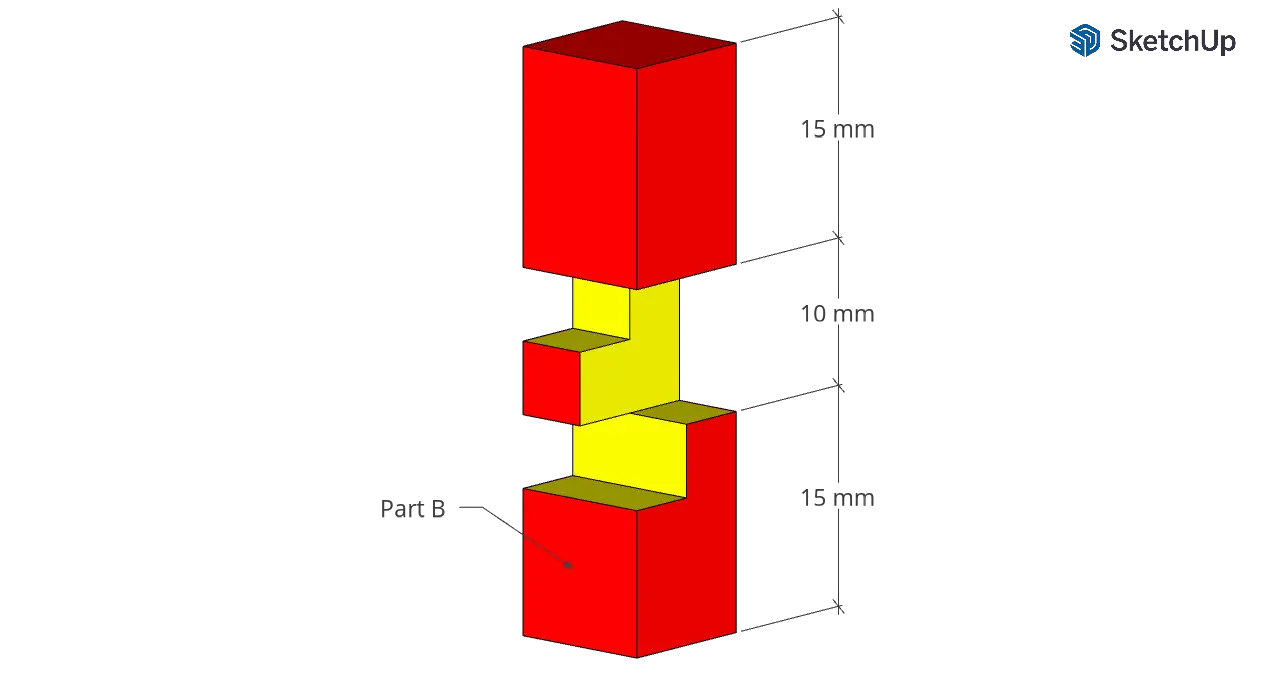 Part B
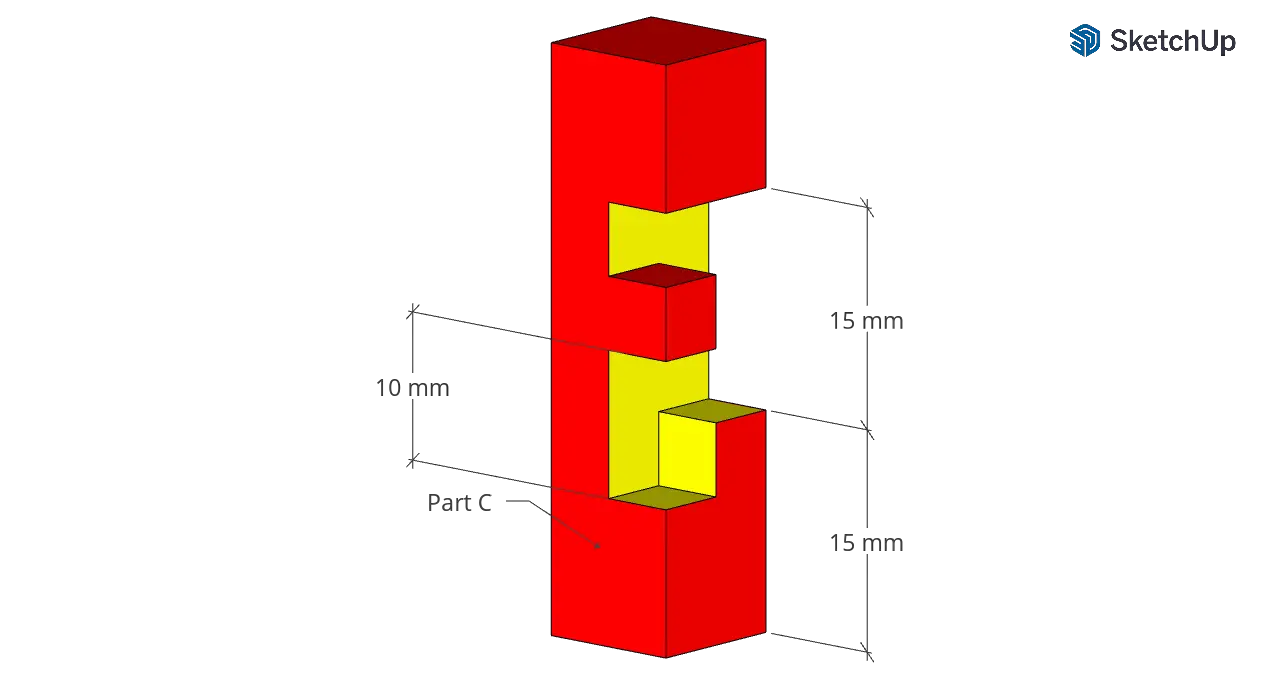 Part C
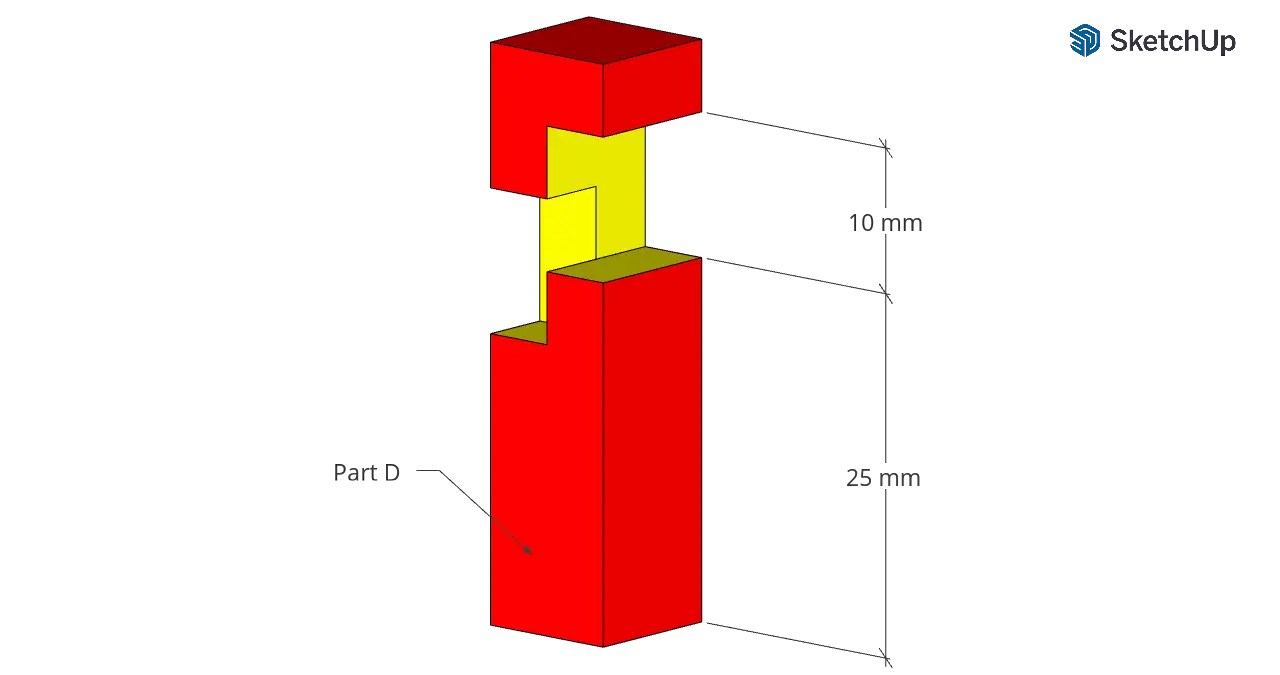 Part D
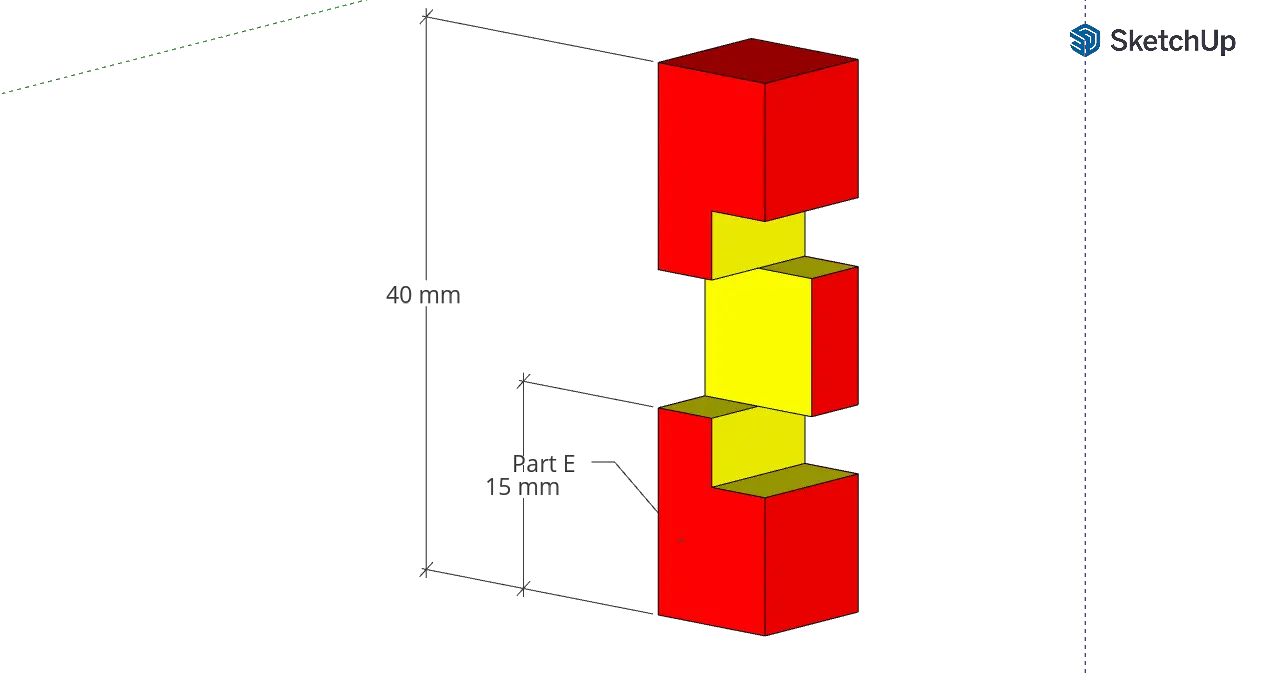 Part E
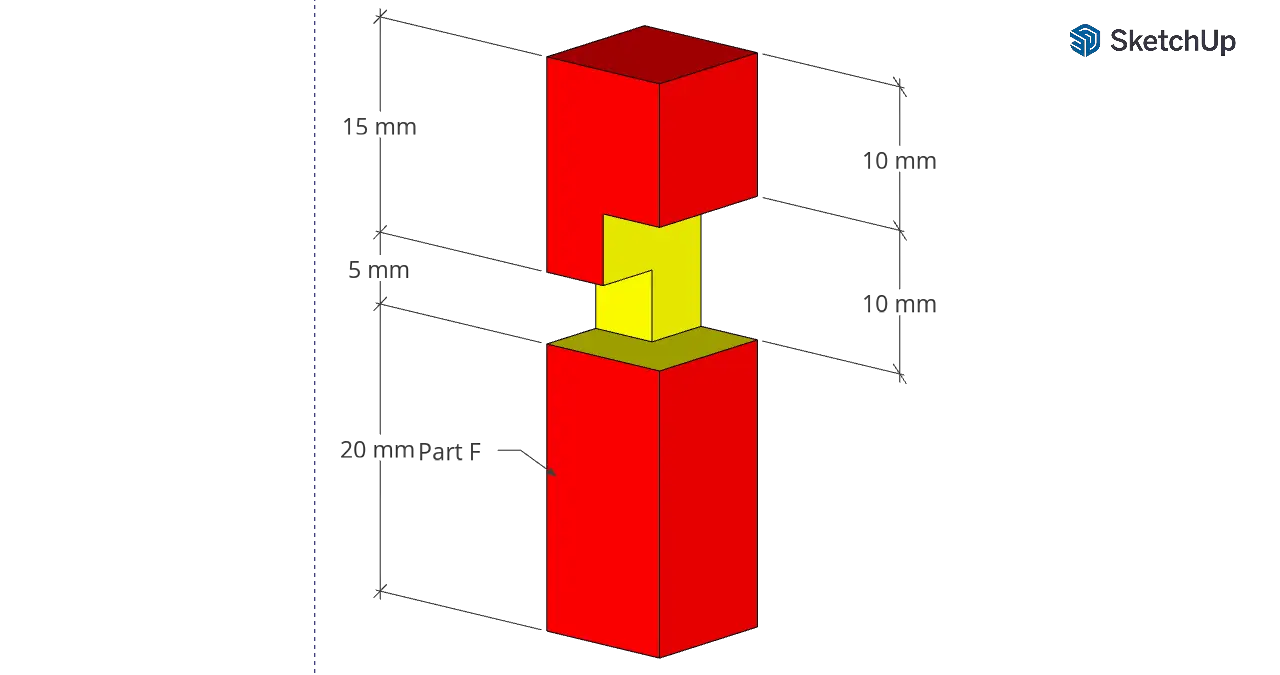 Part F
Another 6 Piece Burr Puzzle
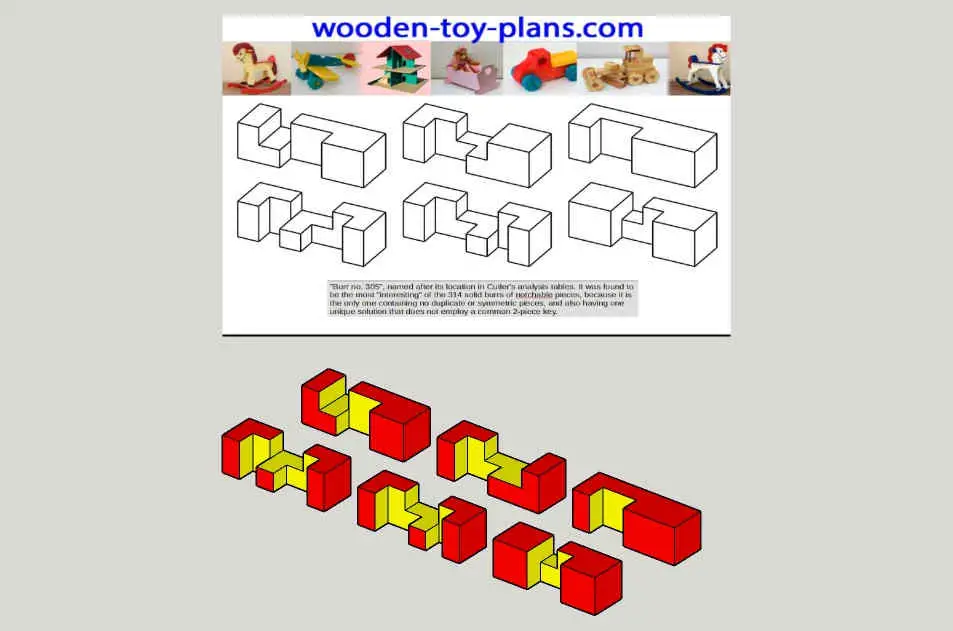
I am not an authority on puzzle, this is what I have discovered:
This 6 piece burr puzzle is named 305 after its location in Cutler's analysis tables.
Apparently there are 314 burr puzzles. This one is regarded as the most interesting.
It contains no duplicate pieces, and it has only one unique soution that does not require a common 2 piece key.
Geometric Form Puzzle
This wooden puzzle started as a SketchUp modelling exercise.
Then I had the bright idea of using magnets at the joints.
I hope to make one sometime soon.
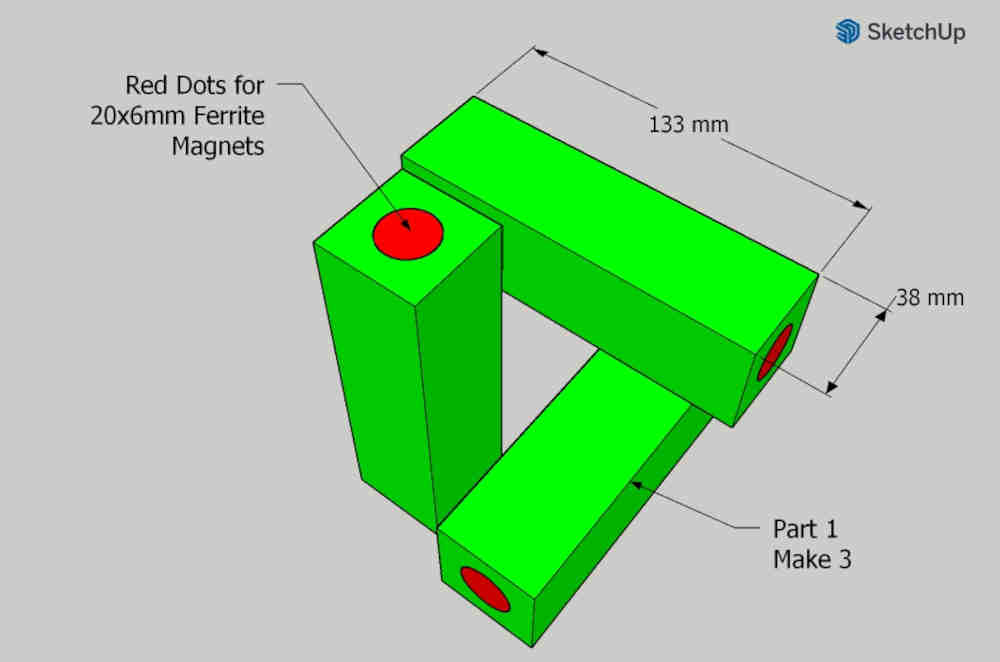 Wooden Puzzle Part 1
Part 1 make 3.
The parts are shown in their relative position.
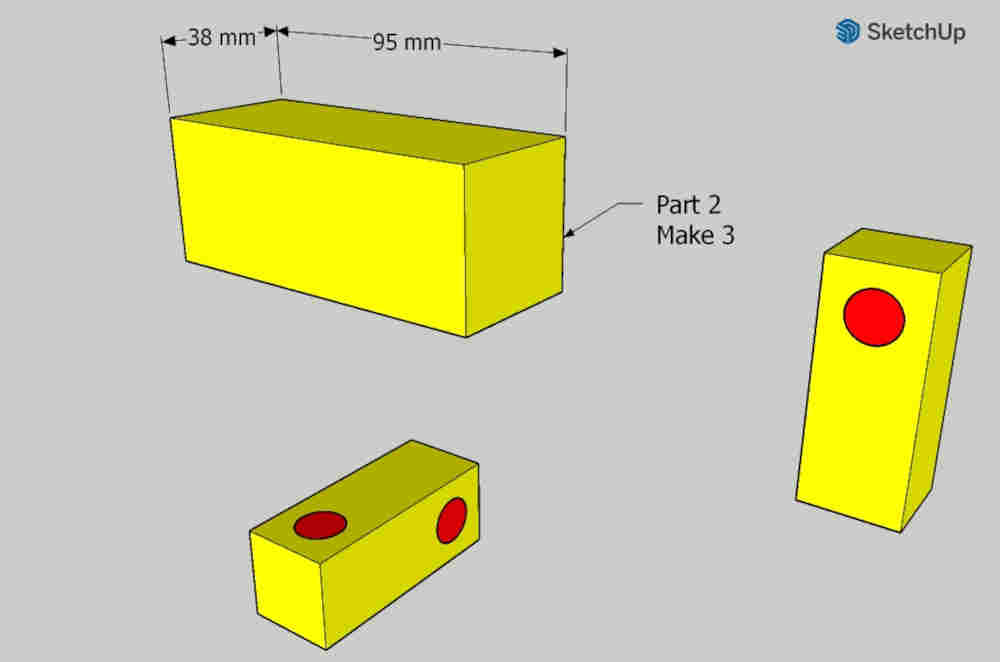
Part 2 make 3.
The red dots for ferrite magnet discs glued into a recess with epoxy glue.
I am given to understand that ferrite magnets are not as strong as rare earth magnets.
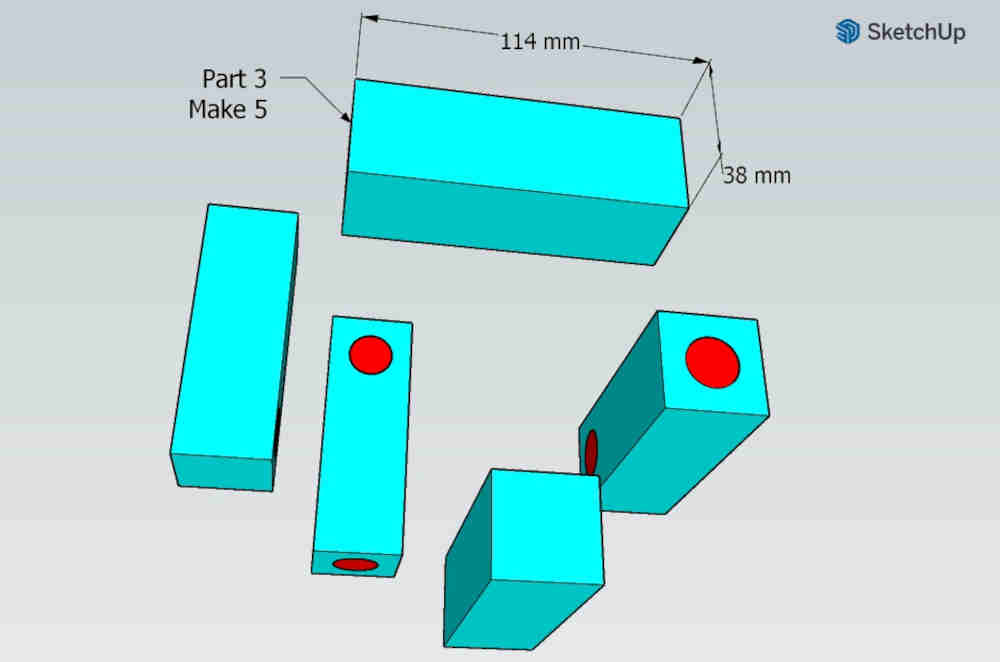
Part 3 make 5.
Maybe making a matched pair of magnets would not be such a good idea. I'm not sure about the polarity of a disc magnet, so I would pair the magnet with a bright steel washer.
How to turn your hobby into a profitable business.
Solo Build It! (SBI!) is an online platform that empowers solopreneurs to build profitable online businesses. For over two decades, SBI! has been trusted by members to turn their passions, hobbies, or skills into successful ventures. Recently, the introduction of ChatGPT has ushered in a new era of AI-assisted content creation within SBI!.
Allow me to introduce you to Tai, your business-building AI assistant. Tai is now available in SBI! and can help you navigate the world of online entrepreneurship. Whether you’re a complete beginner or an experienced solopreneur, SBI! provides everything you need to create an income-generating website or blog.
Here are some reasons why starting an online business with SBI! and Tai is a great choice:
- Adaptable Lifestyle: Building an online business adapts to your desired lifestyle. Enjoy newfound freedom without being tied down to another job.
- Low Startup Costs: You don’t need significant capital to begin. All you require is a computer, internet access, a roadmap, and an affordable platform like SBI!.
- Flexibility: Work as much or as little as you want, wherever you choose. Once you’ve built a solid foundation, you can earn money even on days you don’t actively work.
- Portability: Take your business with you, especially if travel is part of your retirement dream.
- Global Impact: Help people worldwide by sharing your knowledge and expertise.
- Continuous Learning: Running an online business keeps your mind active and energized.
SBI! combines education, tools, and a proven process to give you the highest chance of achieving your financial goals. Whether you’re aiming for financial independence or simply want a rewarding project during retirement, SBI! can guide you.
If any of this resonates with you, I invite you to explore SBI! and discover how it can help you build your online retirement business. Even if you’re a beginner, SBI! provides the resources you need to succeed. Say hello to Tai and embark on your entrepreneurial journey! 🚀
Learn more and try Tai for free on the Solo Build It! website.
