Display Easel Plans
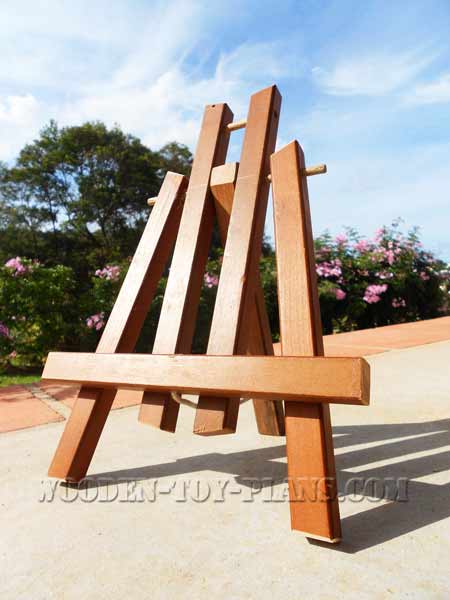
Free display easel plans for displaying your favourite framed pictures and photographs.
This version stands about 300mm (12 inches) high measures about 230mm (9 inches) wide.
Made with project timber using an electric drill and a hand saw.
Here is a perfectly simple and easy woodworking project you can make in less time than it takes to make a cup of coffee.
A great project for someone who is new to woodworking looking to practice their skills but still wants to make something interesting and useful.
Materials
To make this display easel, you will have to buy a 1.8m length of 19mm square project timber. In feet and inches, that translates into a piece of one inch timber 6 feet long.
You will also need a length of 9mm dowel (about 250mm or 10 inches) and a length of braided cord or very thin rope.
You will also need a few very small very thin nails no longer than 30mm or 1 ¼ inches, sometimes called brads.
Just in case you are wondering, I made mine from a recycled wooden outdoor umbrella. It was caught by a gust of wind and smashed onto the roof of the house.
The wooden spokes that supported the canvas was the perfect size.
Tools
This project can be made with very basic tools:
- Electric drill
- Tenon saw
- Sliding bevel
- Combination square
I find a combination square an essential marking out and measuring tool. It also functions very well as something that woodworkers call a story stick. By setting the ruler at the required length, I can transfer the measurement to all the pieces.
Step by Step Instructions using the display easel plans
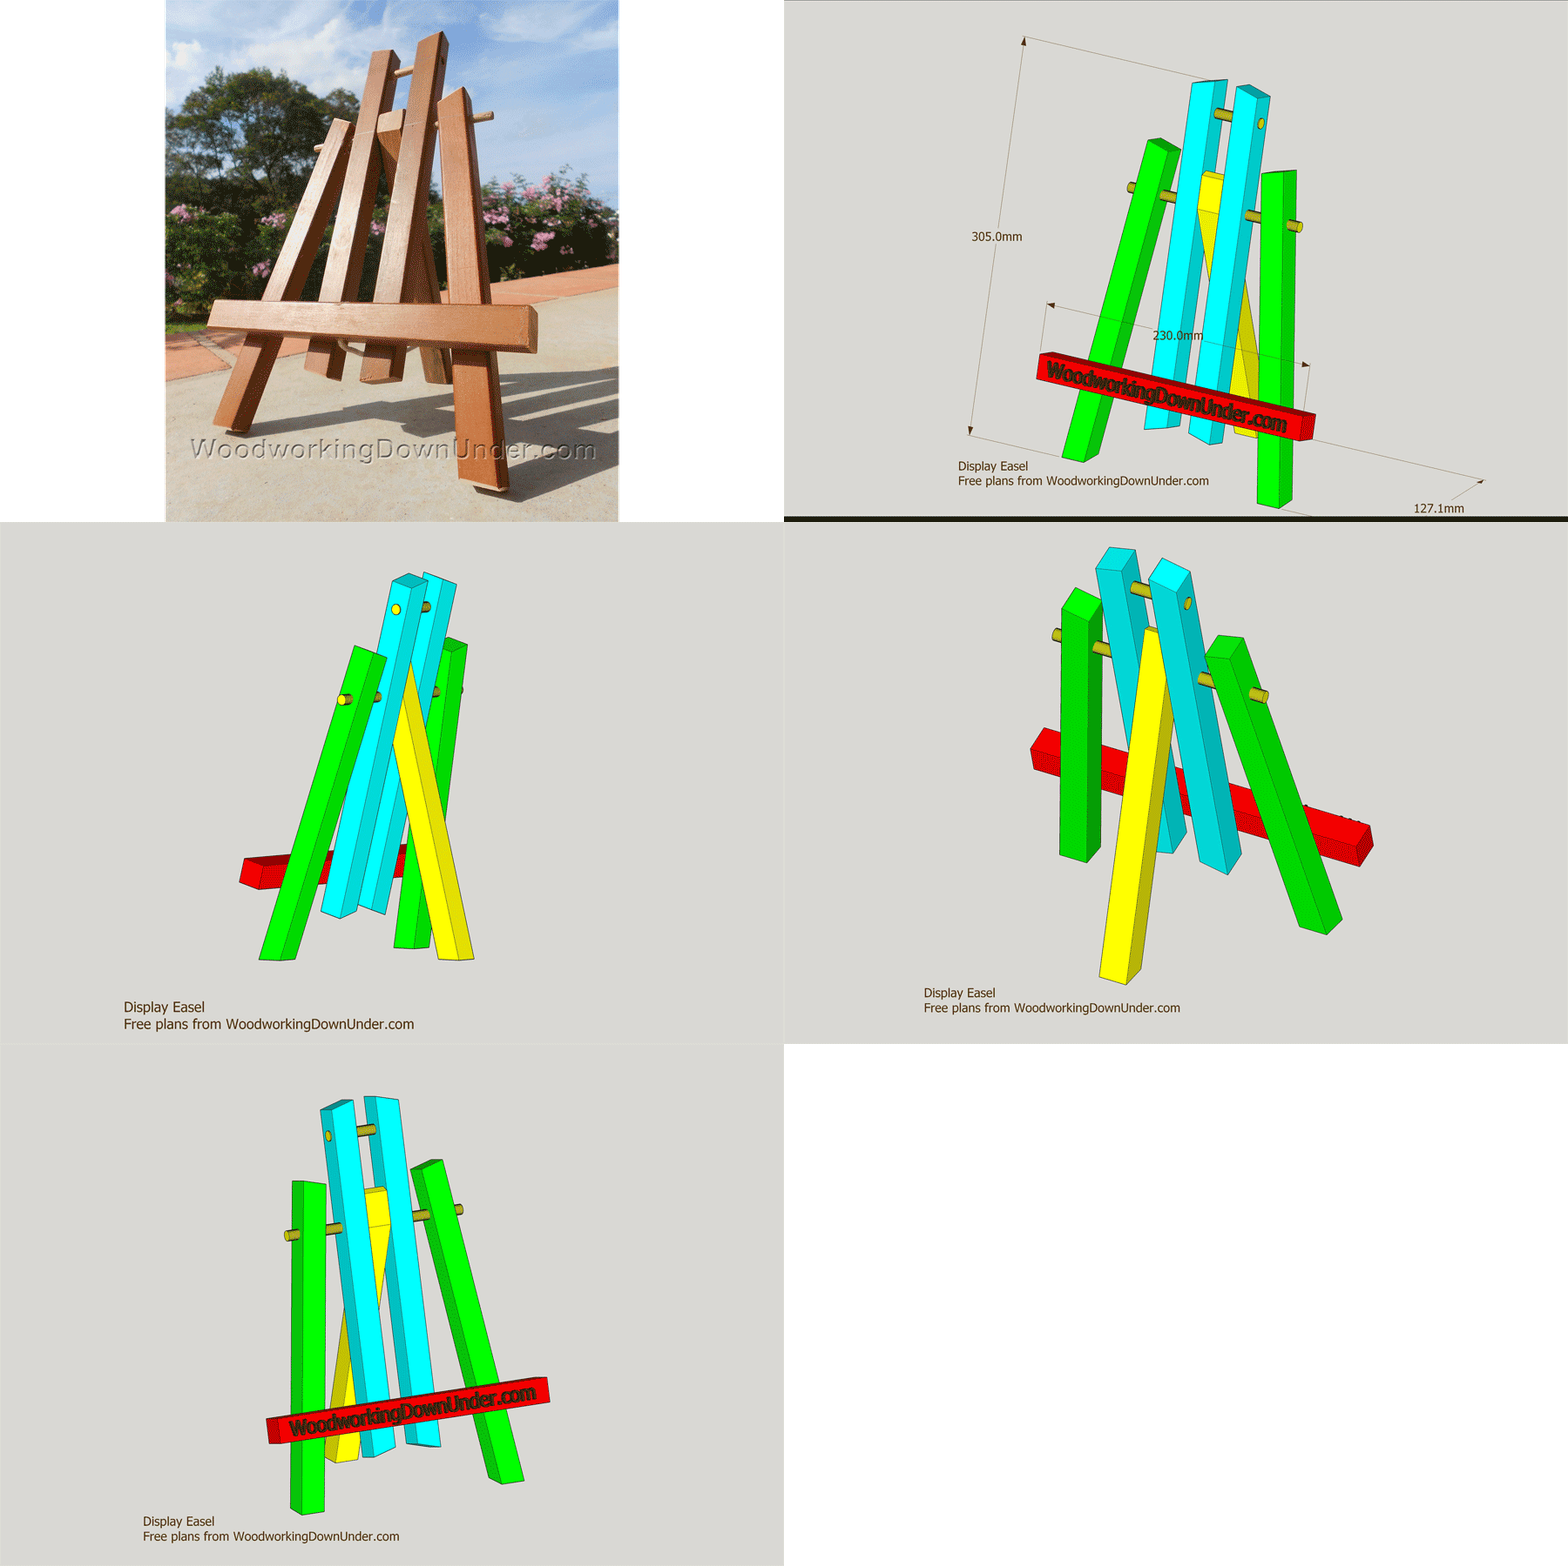
There are four sheets included. Sheet 1 shows the front and side view. Sheet 2 shows the component parts with dimensions.
Sheets 3 and 4 are full size templates that may prove to useful in the final assembly process. Cut each sheet along the line marked “Join Here” and join them together.
Start by cutting the pieces to size. Use the sliding bevel to measure the angles.
Because the sizes are so similar, it would be a good idea to mark each piece as you go along, and make sure you mark them as a handed pair. For example, mark Part 3 as left or right.
Drill the holes at the angles shown in the drawing, again making sure that you have a left and right hand pair for Part 3.
Part 4 is the tripod support leg, and it needs the protruding part trimmed off.
Cut the two dowel pieces to length.
Assembly
This is where you can use the full size template drawings which are included in the display easel plans.
Thread the dowels into each piece and check against the template for the correct position.
Carefully knock a brad (small nail) into Parts 2 and 3 in the area where it will meet Part 1. Allow the end of the nail to protrude just a little on the other side.
Place Part 1 in position on the full size templates. Position the other parts in place and drive the nails in all the way.
Fix the cord and the project is complete.
Download Display Easel Plans
Look for a file with the name woodworking-project-plans.zip in your downloads folder.
Here is a list of the plans:
- Spice rack gift project
- Artist easel
- Display Easel Plans
- Book ends
- Squirrel shelf
- Workbench
- Massage table
And for a bit of light relief after a hard day's woodworking, a few scroll saw patterns.
Enjoy.
Share Photos of Your Latest Project
Have you completed a project that you would like to share?
This is the place to share photos and stories with fellow woodworkers.
Do you have photos to share? Simply use the forms below and click the submit button.
Scroll down to see what others have made.
Projects from all over the world.
Click below to see contributions from other woodworkers from around the world...
Les Smith
A quick afternoon project. I was asked to make some wooden cars by my local craft shop.
I used a bandsaw, spindle sander, pedestal drill with a hole saw …
How to turn your hobby into a profitable business.
Solo Build It! (SBI!) is an online platform that empowers solopreneurs to build profitable online businesses. For over two decades, SBI! has been trusted by members to turn their passions, hobbies, or skills into successful ventures. Recently, the introduction of ChatGPT has ushered in a new era of AI-assisted content creation within SBI!.
Allow me to introduce you to Tai, your business-building AI assistant. Tai is now available in SBI! and can help you navigate the world of online entrepreneurship. Whether you’re a complete beginner or an experienced solopreneur, SBI! provides everything you need to create an income-generating website or blog.
Here are some reasons why starting an online business with SBI! and Tai is a great choice:
- Adaptable Lifestyle: Building an online business adapts to your desired lifestyle. Enjoy newfound freedom without being tied down to another job.
- Low Startup Costs: You don’t need significant capital to begin. All you require is a computer, internet access, a roadmap, and an affordable platform like SBI!.
- Flexibility: Work as much or as little as you want, wherever you choose. Once you’ve built a solid foundation, you can earn money even on days you don’t actively work.
- Portability: Take your business with you, especially if travel is part of your retirement dream.
- Global Impact: Help people worldwide by sharing your knowledge and expertise.
- Continuous Learning: Running an online business keeps your mind active and energized.
SBI! combines education, tools, and a proven process to give you the highest chance of achieving your financial goals. Whether you’re aiming for financial independence or simply want a rewarding project during retirement, SBI! can guide you.
If any of this resonates with you, I invite you to explore SBI! and discover how it can help you build your online retirement business. Even if you’re a beginner, SBI! provides the resources you need to succeed. Say hello to Tai and embark on your entrepreneurial journey! 🚀
Learn more and try Tai for free on the Solo Build It! website.


