Easy Scroll Saw Patterns
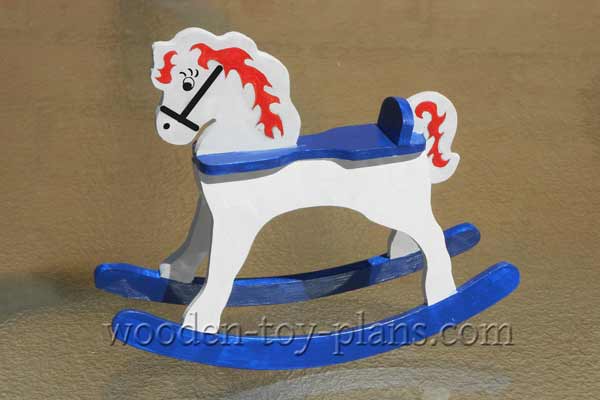 Doll size rocking horse Scarlet
Doll size rocking horse easy scroll saw patterns Easy to make and ideal for beginners, this desktop rocking horse stands almost 200mm (8 inches) to the top of the head. It can be made from 6mm thick plywood or MDF board.
Tools
The right tools make all the difference in the enjoyment of the hobby of woodworking and woodcraft, which is why I would recommend a scroll saw for this project.
- Scroll saw.
- Electric drill. 8mm drill bit.
- 25mm Chisel. Wood file. Optional sanding block. Two spring clamps.
Materials
I used 6mm thick (¼ inch) MDF (Medium Density Fibreboard.)
You may also need the following consumable items:
• 80 grit and 120 grit sandpaper.
• Wood glue.
• Paper glue for fixing the paper patterns to the MDF board.
• Acrylic paint to colours of your choice.
Step by step instructions
The method of construction is pretty straightforward. I think it would be a good idea to read through the instructions first.
 Step 1
Step 1
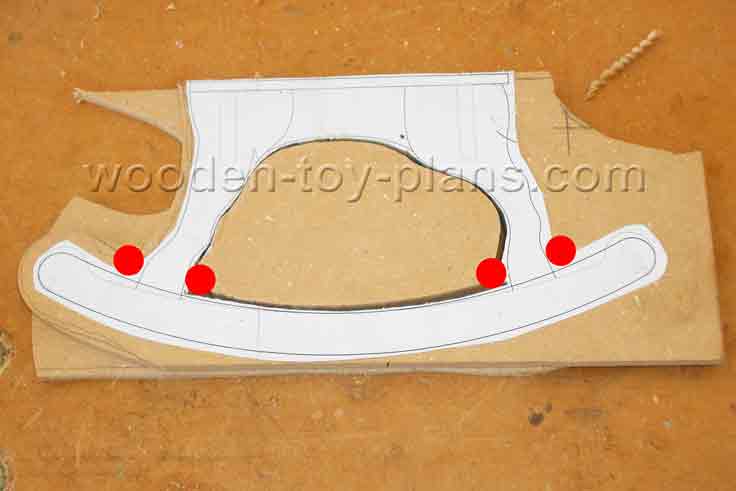
To start, I cut out the paper template slightly oversize and also cut out two pieces of MDF board, also oversize. Stack the two workpieces using any method that suits you.
Double sided sticky tape works well. Borrowing a trick from our woodturning cousins, who often attach a workpiece to the faceplate with a piece of paper in between. I have tried this method with diluted wood glue, and it does work well. Another way is to use rubber spray glue instead of the diluted wood glue.
Drill four holes as shown by the red dots in the photo.
 Step 2
Step 2
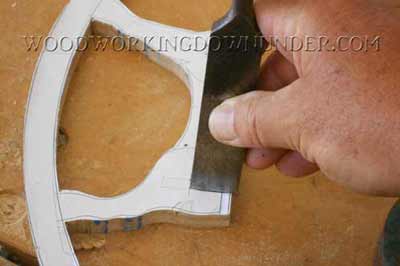
Scribe the width for the joints using a chisel or a sharp knife and steel ruler. Use a scrap piece for accuracy. Cut out the slots within a fraction of a millimeter of the scribed line. This will leave a tiny shelf that makes it easier to trim using a chisel.
 Step 3
Step 3
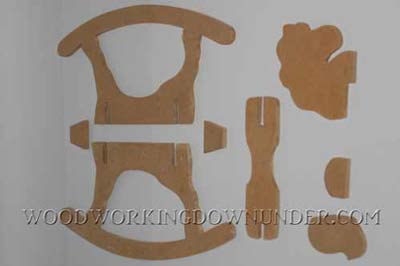
Photo showing all the parts ready for assembly.
 Step 4
Step 4
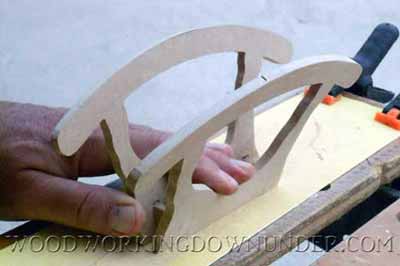
Glue the two formers (shown yellow) to the body (shown blue.) When the glue has set, glue the other side of the body in place. Make sure both sides face the same way.
 Step 5
Step 5
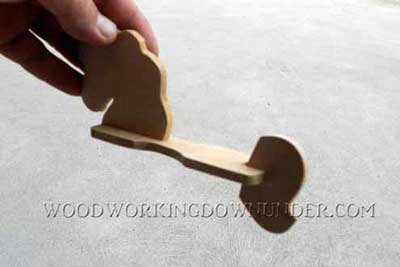
Head and tail attached to the seat. Note the underside of the tail must be 90 degrees to the seat.
 Step 6
Step 6
The top of the body sub-assembly will show a shallow v-groove. I used a roll of painters sandpaper clamped to a piece of wood. Any piece of sandpaper with a grit of 80 or so should also work.
 Step 7
Step 7
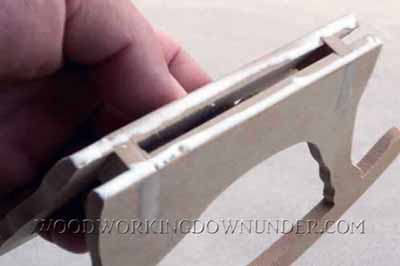
Photo shows two beads of glue ready to accept the head/seat/tail sub-assembly. Note the notch shown red may have to be widened to accept the tail. Again, it is easy to assemble the horse back to front, so make sure you have it the right way around.
 Step 8
Step 8
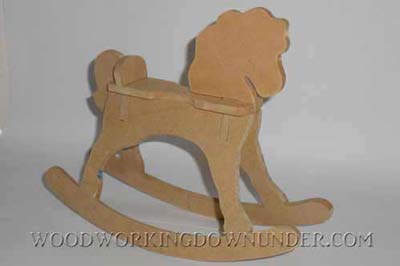
Glue the head-seat-tail assembly in place. Create the angle on the backrest to match the angle of the tail, glue that in place.
Your easy scroll saw patterns
Here is your free printable PDF copy of this doll size rocking horse ornament.
How to turn your hobby into a profitable business.
Solo Build It! (SBI!) is an online platform that empowers solopreneurs to build profitable online businesses. For over two decades, SBI! has been trusted by members to turn their passions, hobbies, or skills into successful ventures. Recently, the introduction of ChatGPT has ushered in a new era of AI-assisted content creation within SBI!.
Allow me to introduce you to Tai, your business-building AI assistant. Tai is now available in SBI! and can help you navigate the world of online entrepreneurship. Whether you’re a complete beginner or an experienced solopreneur, SBI! provides everything you need to create an income-generating website or blog.
Here are some reasons why starting an online business with SBI! and Tai is a great choice:
- Adaptable Lifestyle: Building an online business adapts to your desired lifestyle. Enjoy newfound freedom without being tied down to another job.
- Low Startup Costs: You don’t need significant capital to begin. All you require is a computer, internet access, a roadmap, and an affordable platform like SBI!.
- Flexibility: Work as much or as little as you want, wherever you choose. Once you’ve built a solid foundation, you can earn money even on days you don’t actively work.
- Portability: Take your business with you, especially if travel is part of your retirement dream.
- Global Impact: Help people worldwide by sharing your knowledge and expertise.
- Continuous Learning: Running an online business keeps your mind active and energized.
SBI! combines education, tools, and a proven process to give you the highest chance of achieving your financial goals. Whether you’re aiming for financial independence or simply want a rewarding project during retirement, SBI! can guide you.
If any of this resonates with you, I invite you to explore SBI! and discover how it can help you build your online retirement business. Even if you’re a beginner, SBI! provides the resources you need to succeed. Say hello to Tai and embark on your entrepreneurial journey! 🚀
Learn more and try Tai for free on the Solo Build It! website.
- Home
- Girls Toys
- Easy Scroll Saw Patterns


