Free Rocking Horse Plan
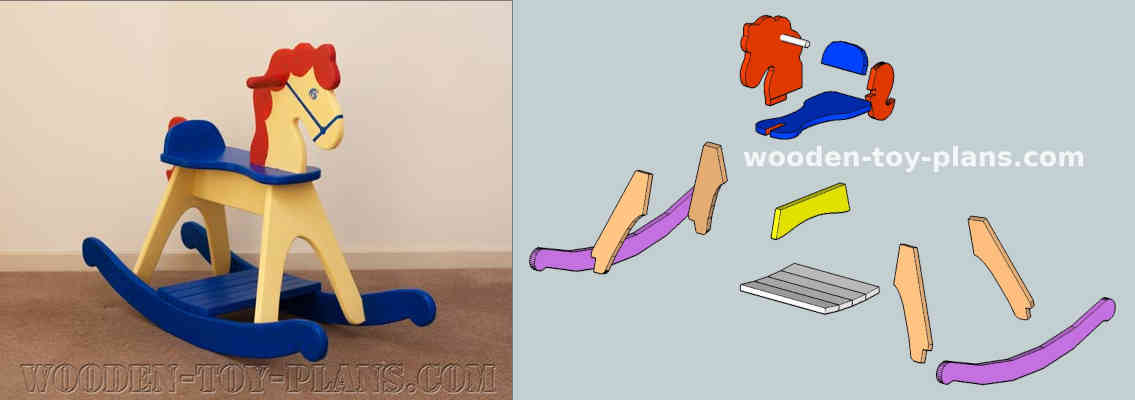
Pinto the free rocking horse plan has been designed for the novice woodworker.
Building guide for Pinto rocking horse
Materials
This free rocking horse plan has been designed to use 19mm (3/4") project timber that is easy to obtain from your local timber supplier and most hardware stores. Sometimes called white wood. The handle is a piece of dowel that just happens to be the same size as a broom handle.
For the eyes, you can use wiggle eyes from your local craft or novelty store. Use ribbon or imitation leather about 10mm wide for the bridle.
Tools
These are some of the tools used to complete this rocking horse project.
A cordless drill is a tool that I use most often. It also drives screws for carpentry work.
Next is a tool to cut curves, which brings to mind a few tools that are best suited to doing that: a jigsaw, a scroll saw or a band saw. I find that a jigsaw is suited to rough cutting out of shapes that are too large for the band saw.
A scroll saw is best for the finer details, but I must mention that there is at least two woodworkers that I know who have used a scroll saw to make this rocking horse project.
A router is often called a workshop in a box. If you don't already have one, it is a worthwhile investment, and something to bear in mind is that generally speaking, you get what you pay for, so buy only the best you can afford.
For me, the router is essential for this project because I use MDF templates with a pattern cutting bit to make multiple copies such as the rockers and the head. The round over bit is also useful for taking off the sharp edge.
If you don't have a router table, you can always make one.
Construction Notes
My preference is to use templates made from 3mm thick material such as masonite or MDF. There are a few reasons for this idea: first I find it much easier to cut out the shapes for the rocking horse patterns because the material is that much easier to work with. I generally use a jigsaw and clean up the rough edges with a half-round file.
Once I have all my templates I can easily lay them out on the workpiece avoiding knots and other faults, make best use of grain direction and maximise the use of the precious timber.
Making The Head
A note about making the head - it may be necessary to butt join two or more pieces of timber to make up a piece wide enough. To do this, you will need at least 3 bar clamps or F-clamps with a capacity of 12 inches, or use a simple jig similar to that used for clamping the legs as noted below.
Some people have used 19mm or 3/4 inch plywood to make the head, which seems to be quite acceptable.

Using the free rocking horse plan, make a rough cut about 1.5mm (or 1/16") oversize, then temporarily attach the template to the workpiece using double sided sticky tape.
The photo above shows duct tape, but I find that foam backed double sided sticky tape works better
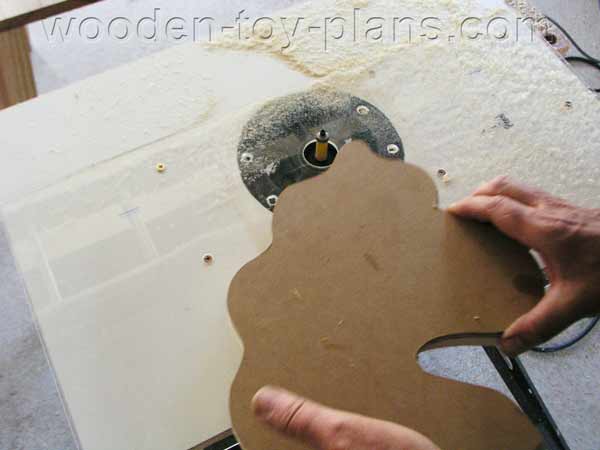
The photo shows the flush trim bit (or a pattern bit, if you prefer) mounted in a router which is in turn mounted in a router table with the template attached to the workpiece.
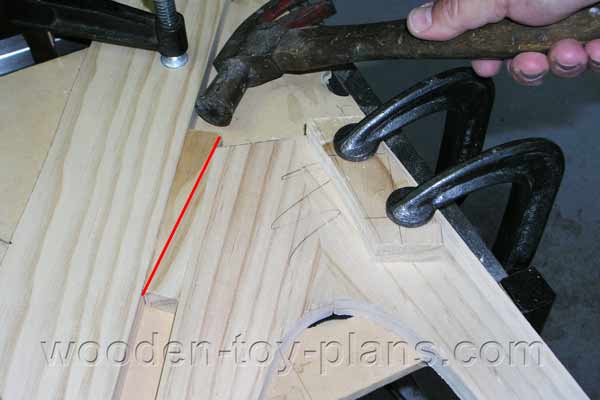
Now for the legs.
A simple jig to clamp the legs by clamping one leg to a board and wedging the other against a piece of timber, as shown by the red line in the photo.
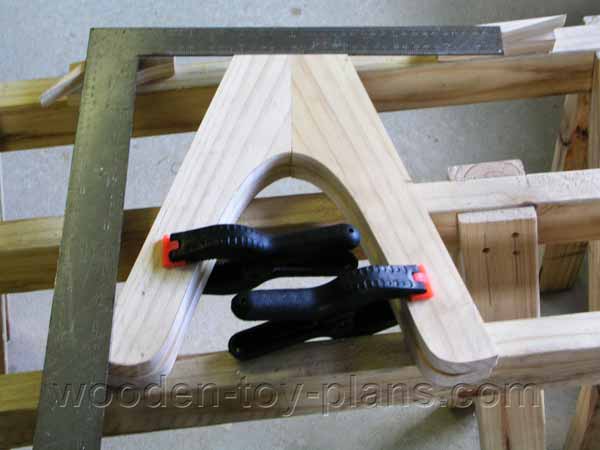
Using a builders square to mark the notch for the rockers.
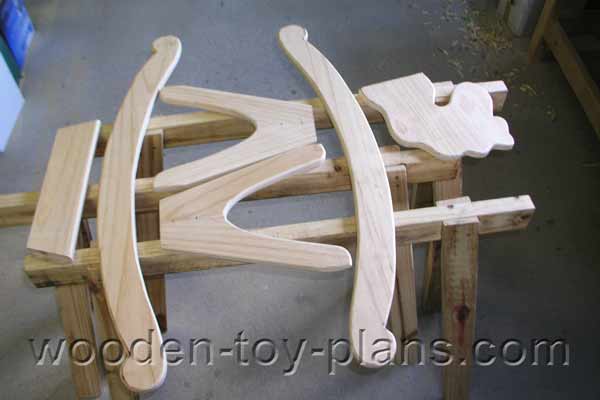
All together now...
Photo showing the body, legs and rockers with edges rounded over and sanded smooth, ready to be assembled.
Not shown here is the seat, the backrest and the tail.
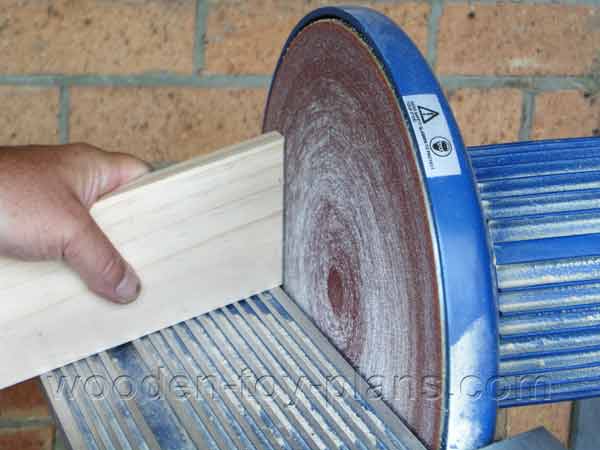
The top of the legs have to be bevelled to match the angle of the body. Here I am using the body to set the angle. Although a 12" disc sander is not absolutely essential for this project, I have found it to be a very useful machine.
It does take a fair amount of skill and patience to achieve the same effect with a smoothing plane.
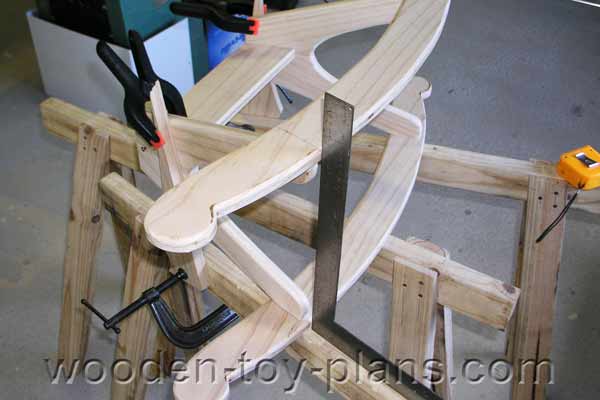
Coming together...
Join the legs to the body, checking the bevel will allow the seat to sit flush.
Photo showing how to use the builders square to line up the rockers to the legs.
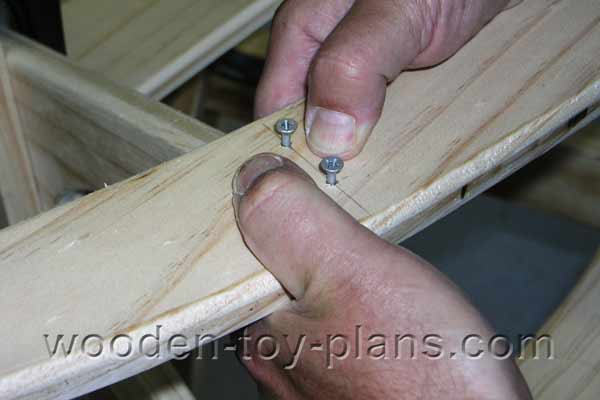
Detail showing method of attaching the rockers to the legs. In this photo I used the screws to mark the position for pilot holes for the screws, in order to minimise the chance of splitting the wood.
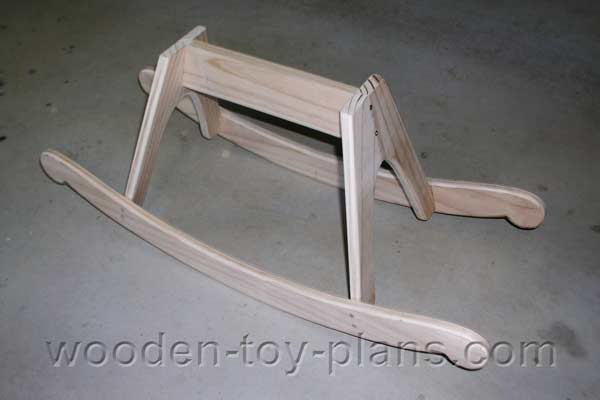
Showing the sub-assembly, ready for the seat, head and tail to be attached.
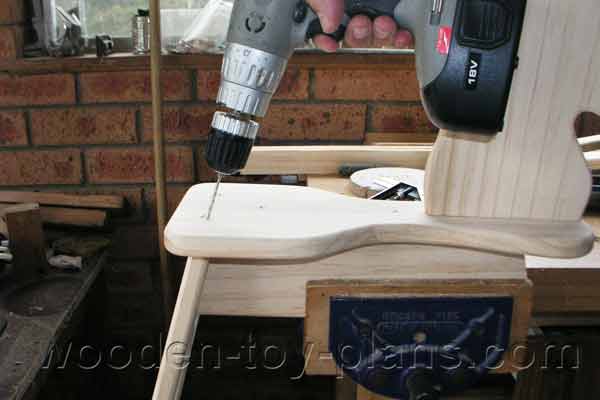
Drilling pilot holes for the head and seat assembly attachment. It is important to line up the angle to the legs.
Note that the front legs are not attached in this photo, it was only to be able to hold it in the vise.
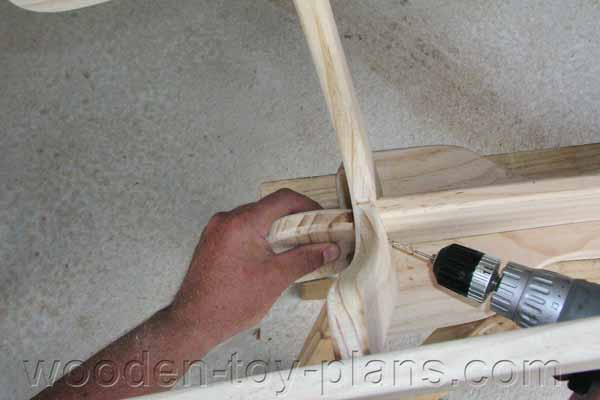
In this photo showing the underside, I am drilling more pilot holes to attach the tail.
One screw on each side at different levels.
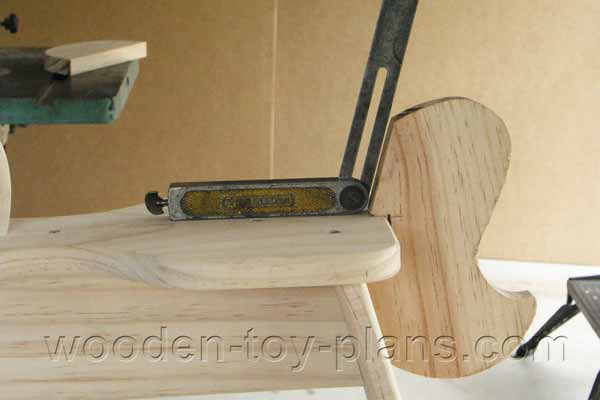
Using the sliding bevel to obtain the angle for the bevel on the backrest.
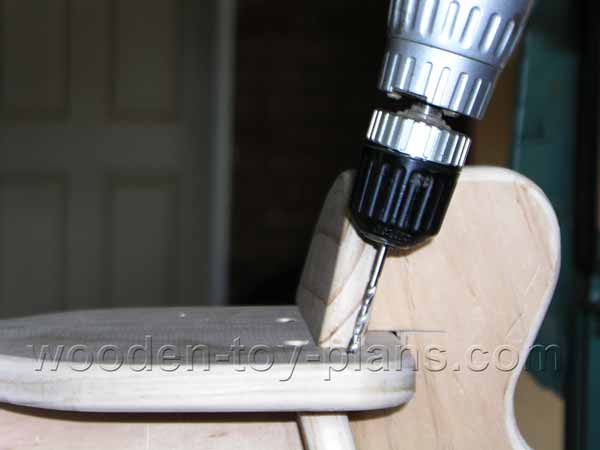
More pilot holes! This one on the edge of the seat, just past the top of the legs, to secure the backrest.
Once the backrest is secured in place, there is one more screw into the tail.
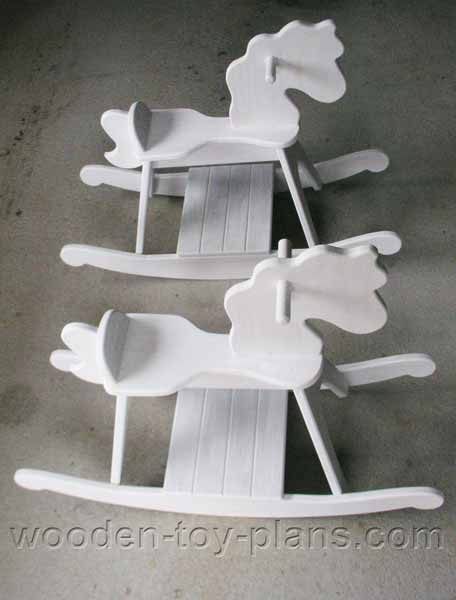
Showing a pair of completed rocking horses wearing their undercoats, ready for painting.
Download Pinto Rocking Horse Plans
Instant digital download print ready PDF Rocking Horse PintoProjects Gallery
I certainly hope you enjoy using this free rocking horse plan.
Visit the woodworking projects gallery to view projects from people all around the world.
How to turn your hobby into a profitable business.
Solo Build It! (SBI!) is an online platform that empowers solopreneurs to build profitable online businesses. For over two decades, SBI! has been trusted by members to turn their passions, hobbies, or skills into successful ventures. Recently, the introduction of ChatGPT has ushered in a new era of AI-assisted content creation within SBI!.
Allow me to introduce you to Tai, your business-building AI assistant. Tai is now available in SBI! and can help you navigate the world of online entrepreneurship. Whether you’re a complete beginner or an experienced solopreneur, SBI! provides everything you need to create an income-generating website or blog.
Here are some reasons why starting an online business with SBI! and Tai is a great choice:
- Adaptable Lifestyle: Building an online business adapts to your desired lifestyle. Enjoy newfound freedom without being tied down to another job.
- Low Startup Costs: You don’t need significant capital to begin. All you require is a computer, internet access, a roadmap, and an affordable platform like SBI!.
- Flexibility: Work as much or as little as you want, wherever you choose. Once you’ve built a solid foundation, you can earn money even on days you don’t actively work.
- Portability: Take your business with you, especially if travel is part of your retirement dream.
- Global Impact: Help people worldwide by sharing your knowledge and expertise.
- Continuous Learning: Running an online business keeps your mind active and energized.
SBI! combines education, tools, and a proven process to give you the highest chance of achieving your financial goals. Whether you’re aiming for financial independence or simply want a rewarding project during retirement, SBI! can guide you.
If any of this resonates with you, I invite you to explore SBI! and discover how it can help you build your online retirement business. Even if you’re a beginner, SBI! provides the resources you need to succeed. Say hello to Tai and embark on your entrepreneurial journey! 🚀
Learn more and try Tai for free on the Solo Build It! website.
- Home
- Rocking Horses
- Free Rocking Horse Plan
