Free Doll House Plans
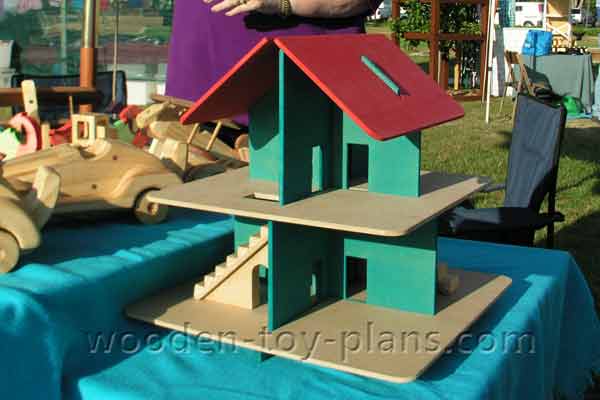
Free doll house plans for making a toy house for dolls. A doll house is usually top of the list when you ask a little girl what they would like for a present.
It's all too easy to buy a plastic doll house from a toy shop, so why not show how much you care by making one yourself. This is the best present you can give your child because you made it. The design is simple enough for anyone to make using only hand tools.
Plans to make a doll house. There are two versions of this plan, the first for barbie size dolls and the other for dolls up to six inches tall.
The difference with these plans is the fact that they come apart to store flat. Most barbie doll houses stand at least three feet tall and can present a storage problem.
The original free doll house plans specify 6mm thick top quality birch plywood, but it's not always available, so I decided to use MDF instead. For the barbie dollhouse I would recommend a thickness of at least 9mm or 3/8"
It's not my favourite material to work with but it does have it's advantages, price and availability being two of them. It's not as robust as top quality birch plywood, but it will do in a pinch.
Solve The Dollhouse Storage Problem
A doll house can be a nuisance around the house. They tend to be bulky and difficult to store out of the way. With this free doll house plan you cna buid one that knocks down and can be flat-packed for storage under the bed and out of the way. The parts are shaped so that it is easy enough for a child to learn to assemble themselves.
Tools
Please note the plans in the book show a scroll saw being used. I made mine using a jigsaw. A band saw would obviously be better if you already have one.
- Power drill, corded or battery powered.
- Jigsaw, sometimes called a sabre saw.
- Tenon saw, also known as a back saw.
- A sharp woodworking chisel, 19mm (3/4.")
- Drill bits - 8mm twist drill and 40mm spade bit.
- Sharp utility knife and steel ruler or straight edge.
- Sanding block, 120 and 240 grit garnet sandpaper and 400 grit wet/dry sandpaper.
For any kind of woodworking or wood crafting project, you will need some kind of working surface.
I started with a Black & Decker Workmate, and later on, decided it was time to make my own woodworking bench, and you can too.
Materials
For the 6 inch version of this free doll house plan, use 6mm birch plywood, the best quality you can find. 6mm Medium Density Fibreboard (MDF) can be used, but it may not withstand the knocks it receives in the normal course of play.
For the barbie doll size version, I would suggest using 9mm or 12mm thick birch plywood, or again, MDF. For decorating use child safe acrylic paint, colours of your choice. Food colouring is an option, but on MDF the colour does not come through that well.
Cutting List
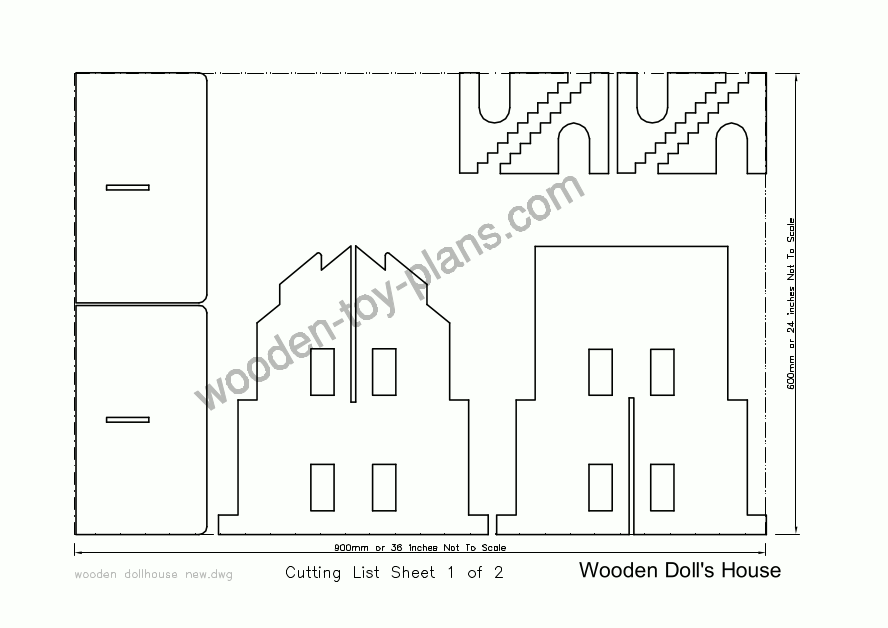
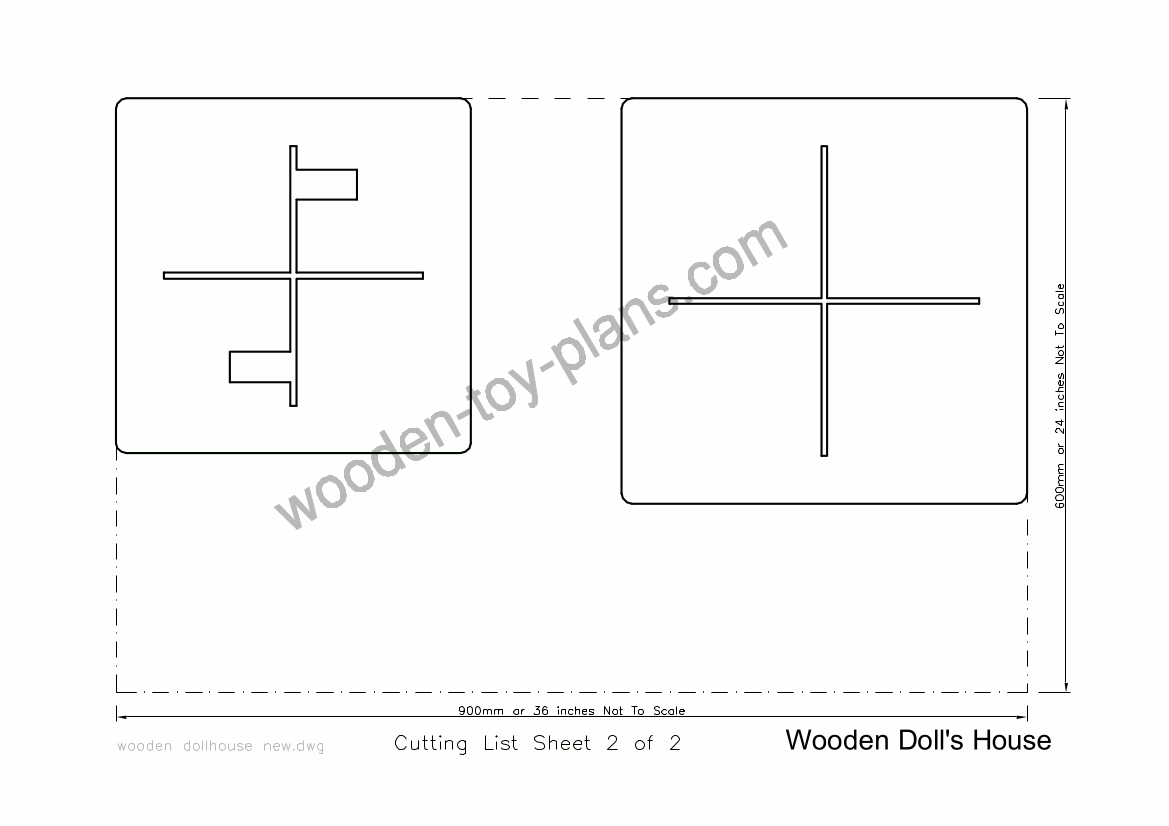
For the 6 inch dolls house, I used 2 sheets of 6mm thick MDF 900 x 600mm wide. That translates into 1/4 inch MDF 36 x 24 inches.
 |
 |
For the barbie size version, use 2 sheets of 2.4m x 1.2m (8ft x 4ft).
Step by Step Instructions
 Step 1
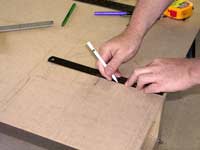
Step 1. Carefully mark out the board after studying the plans to see how everything fits together. A set of compasses are useful for marking out parallel lines. Shade the waste areas to be sure you cut on the right side of the pencil lines.
 Step 2
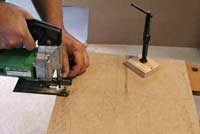
Step 2. Cutting long straight lines with a jigsaw can be tricky. Aim to cut just a fraction off the line on the waste side. Go real slow, time spent getting it right saves time trying to fix it later. It should be easy to shave off the high spots with a sheet of 120 grit sandpaper or a file.
 Step 3
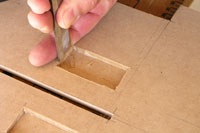
Step 3. Drill pilot holes for the doors and roof slots. It's a good idea to scribe the lines with a sharp knife before cutting with a jigsaw.
To cut clean holes, I scribe around the rectangle using a straight edge and a sharp utility knife. Make a few passes without too much pressure on the knife, just enough to cut it about half a millimeter deep. Using a jigsaw or a scrollsaw, cut about a millimeter off the scribed line on the waste side. The result is a tiny shelf that provides a key for the chisel to rest against when cleaning up.
 Step 4
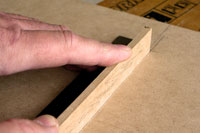
Step 4. It is important to cut the slots as accurately as possible for a good fit. Scribe one side with a sharp knife, use a scrap piece to measure then scribe the other side. Aim for a slot that is not too loose or too tight.
 Step 5
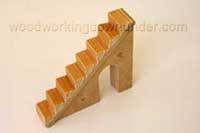
Step 5. The stairs are made by laminating three or more pieces together. The dowels are used to keep the pieces aligned while under clamping pressure.
The arch shown is for the smaller dolls house.
The steps may be cut using a tenon saw if you don't have a bandsaw.
 Final
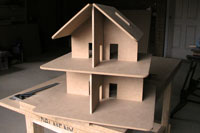
FinalFinal. Round over all sharp edges and corners, and the dolls house is ready for painting.
Child Safe Paints
The parts should be finished in child safe non-toxic paint. Check with the manufacturer to ensure the paint really is suitable for applying to children's toys - it must have no harmful effects if the toy is put into the mouth. A less costly alternative is to use food colouring, which also has the advantage of being available in your local supermarket.
Download Free Doll House Plans
More Doll House Plans
A few more DIY doll house plans including a set of plans to build a play scale size Victorian doll houses.
Sponsored Link.Barbie Doll House Plans for sale on eBay.com
How to turn your hobby into a profitable business.
Solo Build It! (SBI!) is an online platform that empowers solopreneurs to build profitable online businesses. For over two decades, SBI! has been trusted by members to turn their passions, hobbies, or skills into successful ventures. Recently, the introduction of ChatGPT has ushered in a new era of AI-assisted content creation within SBI!.
Allow me to introduce you to Tai, your business-building AI assistant. Tai is now available in SBI! and can help you navigate the world of online entrepreneurship. Whether you’re a complete beginner or an experienced solopreneur, SBI! provides everything you need to create an income-generating website or blog.
Here are some reasons why starting an online business with SBI! and Tai is a great choice:
- Adaptable Lifestyle: Building an online business adapts to your desired lifestyle. Enjoy newfound freedom without being tied down to another job.
- Low Startup Costs: You don’t need significant capital to begin. All you require is a computer, internet access, a roadmap, and an affordable platform like SBI!.
- Flexibility: Work as much or as little as you want, wherever you choose. Once you’ve built a solid foundation, you can earn money even on days you don’t actively work.
- Portability: Take your business with you, especially if travel is part of your retirement dream.
- Global Impact: Help people worldwide by sharing your knowledge and expertise.
- Continuous Learning: Running an online business keeps your mind active and energized.
SBI! combines education, tools, and a proven process to give you the highest chance of achieving your financial goals. Whether you’re aiming for financial independence or simply want a rewarding project during retirement, SBI! can guide you.
If any of this resonates with you, I invite you to explore SBI! and discover how it can help you build your online retirement business. Even if you’re a beginner, SBI! provides the resources you need to succeed. Say hello to Tai and embark on your entrepreneurial journey! 🚀
Learn more and try Tai for free on the Solo Build It! website.
- Home
- Girls Toys
- Free Doll House Plans
