Woodcraft Plans
Woodcraft plans to make this humble waste paper bin. Simple and easy to make with just a few hand tools.
This waste paper bin, with it's decoupage finish, makes an attractive gift, and would be a valuable addition to any home.
Materials
A single project board sheet of 6mm MDF, 900mm by 1200mm is enough to make three waste paper bins.
I used a dark blue spray paint for the inside and artists gold acrylic paint for the edges as a finishing touch.
Clear varnish for the decoupage.
Tools
This is a list of tools that I used to complete the project.
- Bandsaw, Jigsaw or Scroll Saw.
- Smoothing plane.
- Electric drill.
- Drum sander.
- Set square.
- Sliding bevel.
- Clamps.
- Sanding block.
- Artists ruling pen(optional.)
You may also need the following consumable items.
- Duct tape.
- Double sided tape.
- Woodworking glue.
- 120 grit sandpaper.
- A can of dark blue aerosol spray paint.
- Artists acrylic gold paint.
Download woodcraft plans
Download the set of free woodcraft plans, which includes a cutting list and full size patterns.
Preparation.
It's always a good idea to read these instructions first to get an idea of the steps involved.
Step 1
Print the template, and use it to mark out the parts onto the project board.
Cut out the parts slightly oversize by about 1.5 to 2mm. This will leave just enough material to achieve a smooth finish.
Don't cut the curve along the top yet, this will be done later.
Step 2
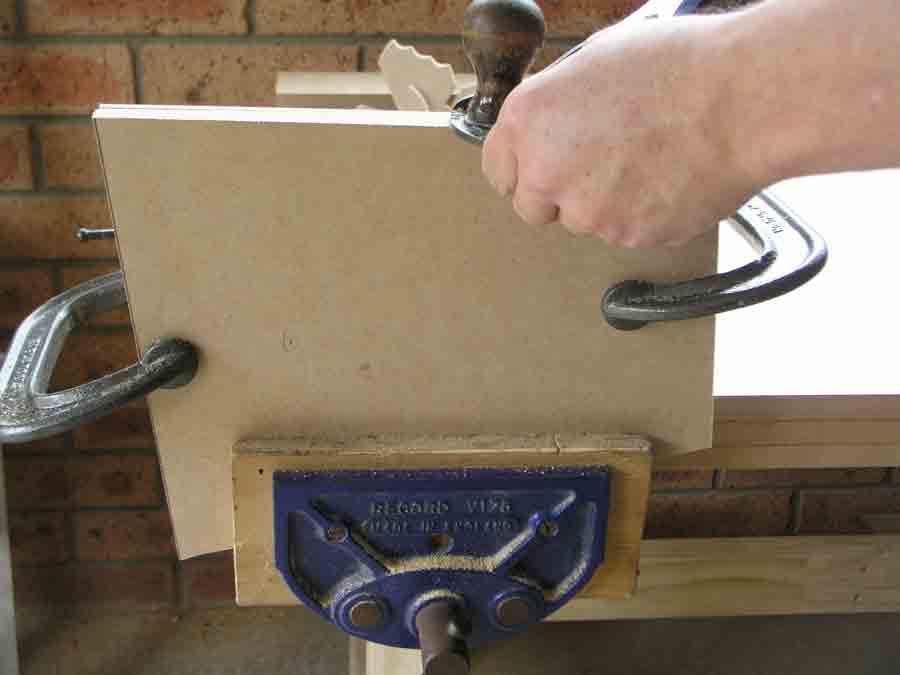
Stack the four sides together using double sided tape to hold them in position. I used one piece in each corner, about an inch long.
Clamped in the vise and shave the edges with a smoothing plane.
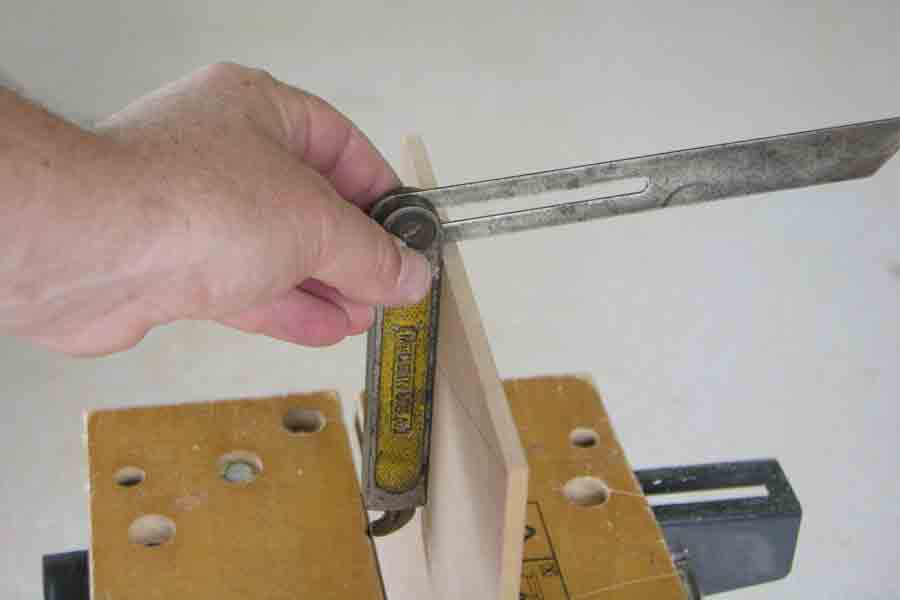
Use a sliding bevel to measure the angles.
Step 3
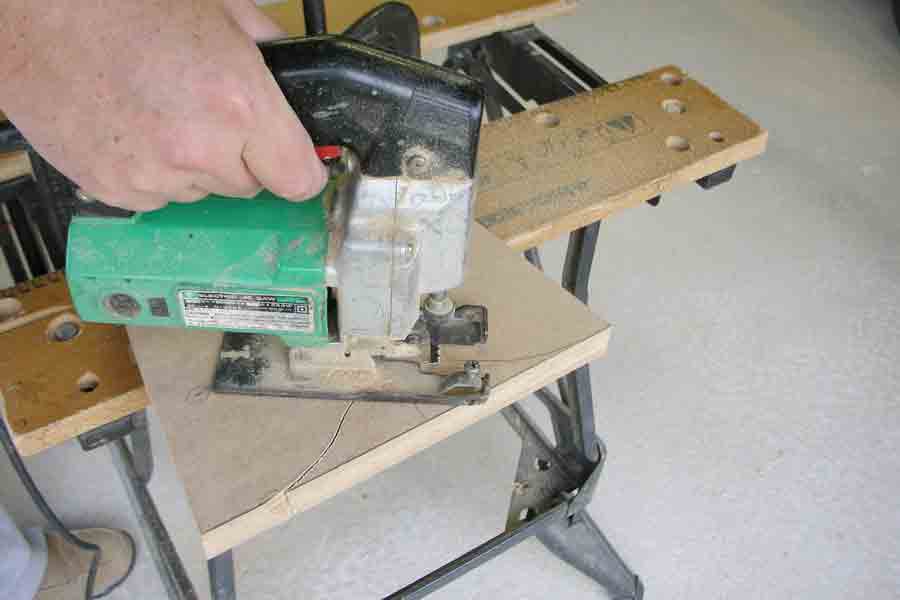
Mark out the curve using the paper template. Cutting the curve using a jigsaw. A bandsaw or a scroll-saw could also be used.
Step 4
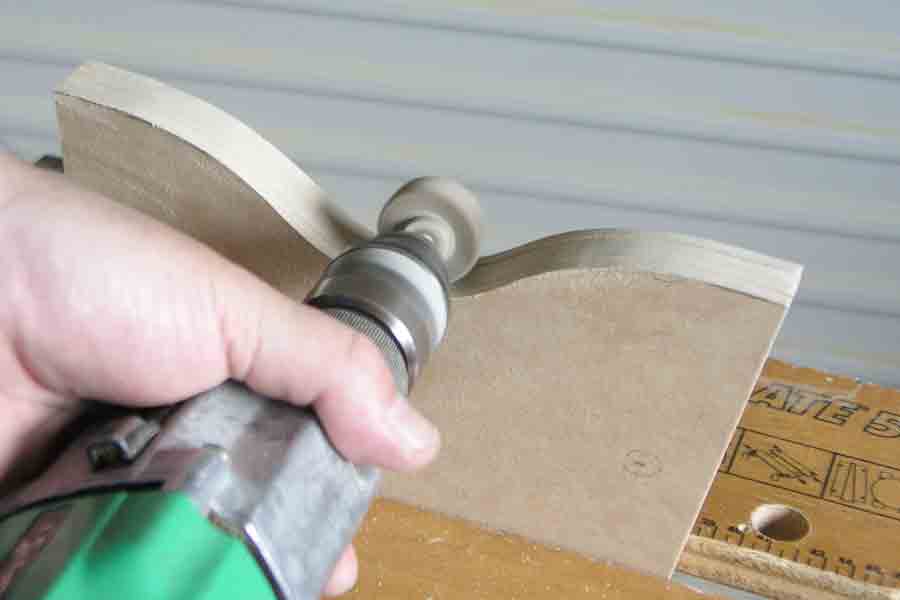
Using a drum sander to smooth the curves.
Step 5
Carefully separate the panels.
Use a sliding bevel to measure the angle for the bottom of each panel. The bevel is formed with the use of the smoothing plane.
Step 6
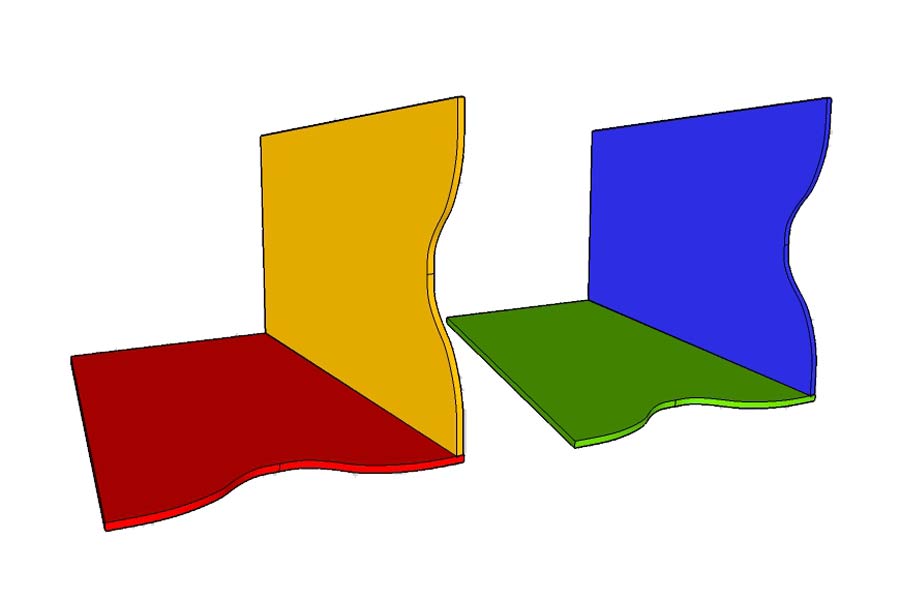
This is about joining the panels together. Essentially, I make two L-shape panels and join them together.
To keep the base square, the joints follow each other. Difficult to describe, perhaps, so I made an illustration with each of the four panels a different colour.
 Step 6B
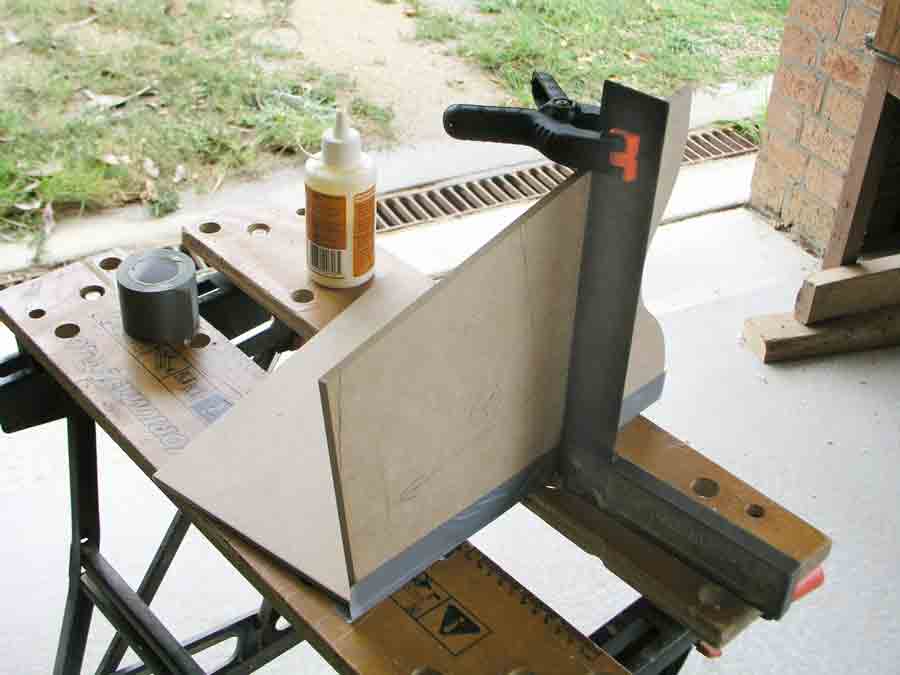
This is how I do it. Lay the panels flat, with a gap of 6mm and tape the joint with duct tape. Turn the panels over, and run a bead of glue along the edge.
Lift one side 90 degrees and support with the square as shown in the photo.
Make sure the vertical panel is resting on the edge of the horizontal panel.
Do the same with the other two panels.
Note:
Make sure the bevel on the panels are facing the right way, so that the base will fit properly.
Step 7
Once the glue is set, join the two sides together.
Fit and glue the base.
Step 8
Final construction. Give the glue enough time to set properly, because now you are going to trim all the edges flush.
I painted the inside of my waste paper bin with a dark blue spray paint before covering it with a decoupage finish.
How to turn your hobby into a profitable business.
Solo Build It! (SBI!) is an online platform that empowers solopreneurs to build profitable online businesses. For over two decades, SBI! has been trusted by members to turn their passions, hobbies, or skills into successful ventures. Recently, the introduction of ChatGPT has ushered in a new era of AI-assisted content creation within SBI!.
Allow me to introduce you to Tai, your business-building AI assistant. Tai is now available in SBI! and can help you navigate the world of online entrepreneurship. Whether you’re a complete beginner or an experienced solopreneur, SBI! provides everything you need to create an income-generating website or blog.
Here are some reasons why starting an online business with SBI! and Tai is a great choice:
- Adaptable Lifestyle: Building an online business adapts to your desired lifestyle. Enjoy newfound freedom without being tied down to another job.
- Low Startup Costs: You don’t need significant capital to begin. All you require is a computer, internet access, a roadmap, and an affordable platform like SBI!.
- Flexibility: Work as much or as little as you want, wherever you choose. Once you’ve built a solid foundation, you can earn money even on days you don’t actively work.
- Portability: Take your business with you, especially if travel is part of your retirement dream.
- Global Impact: Help people worldwide by sharing your knowledge and expertise.
- Continuous Learning: Running an online business keeps your mind active and energized.
SBI! combines education, tools, and a proven process to give you the highest chance of achieving your financial goals. Whether you’re aiming for financial independence or simply want a rewarding project during retirement, SBI! can guide you.
If any of this resonates with you, I invite you to explore SBI! and discover how it can help you build your online retirement business. Even if you’re a beginner, SBI! provides the resources you need to succeed. Say hello to Tai and embark on your entrepreneurial journey! 🚀
Learn more and try Tai for free on the Solo Build It! website.
