Wooden Toy Wheels
How to make wooden toy wheels using a circle cutter.
Most of the time it is a lot easier to buy ready made wooden wheels, but there may be a reason that you will want to make your own.
Who would have thought making a simple wooden disc would be such a challenge? As with most things in life, it is easy to do, but not so easy to do well.
Tools
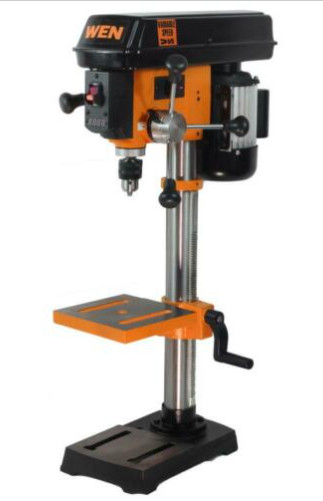
It's best to use a drill press and set the speed to no faster than 500 RPM.
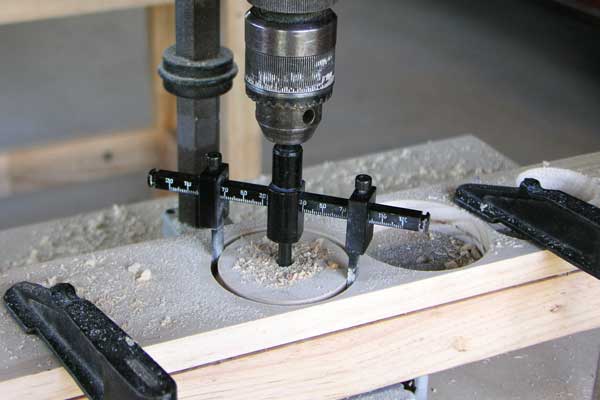
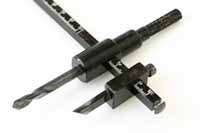
The first step to making your own wooden toy wheels is to modify a circle cutter like the one shown in the photo above.
My experience with this tool leads me to believe it works best with soft woods like pine.
I have tried it on other types of wood with mixed results. If this is the first time you are using this tool, I would suggest practicing on a piece of scrap.
A circle cutter is designed to cut holes, but we want to use the leftover bit, that is the plug, to use as wheels. The cutters are shaped in such a way that it will leave a bevelled edge on the wheel.
What I did was to grind the bevel of the circle cutter on the opposite side so that the wheel came out nice and smooth.
It is important to remember safety first! I used a bench grinder while holding the cutter part of the tool firmly in a vise grip.
All I need to do now is to bolt the wheel into the drill and sand the edges smooth.
The photo shows a circle cutter in action. Note how the workpiece is clamped onto a piece of scrap.
Keep well clear of those spinning arms, and be sure to use a slow speed setting. Most circle cutters and wheel cutters recommend a maximum speed of 500 rpm.
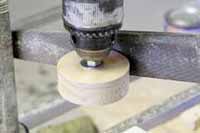
With a nut and bolt to clamp the wheel in the drill, use a wood file to remove the bur and round off the edges.

Use a small sanding belt for a smoother finish.

For the final touch, plug the hole with a short length of dowel. Using a simple jig as shown clamped in place, drill a shallow hole with a 16mm spade bit.
How to make large diameter wheels
The way I normally make wheels for toys is to use a circle cutter – I am happy to do this for wheels up to about 70mm in diameter. Making anything bigger makes me feel less comfortable.
This is how I make large wheels using a disc sander and a very simple but effective jig. When I say large wheels, I mean the size of wheels that cannot be made using the fly cutter, which is another method for making wooden toy wheels.
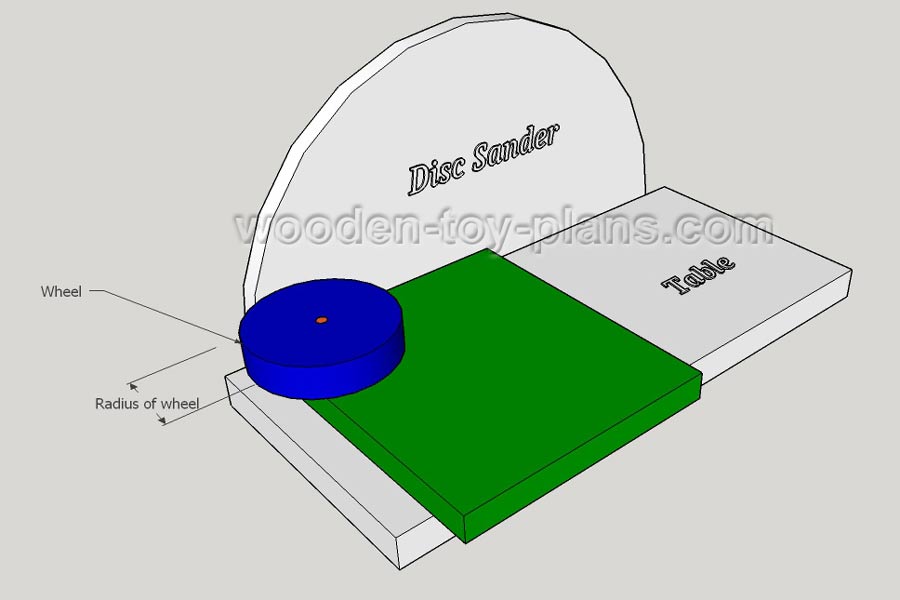
In the image above, the green represents the jig, very similar to a bench hook. The blue disc is the wheel, and the red dot in the middle is the axle.
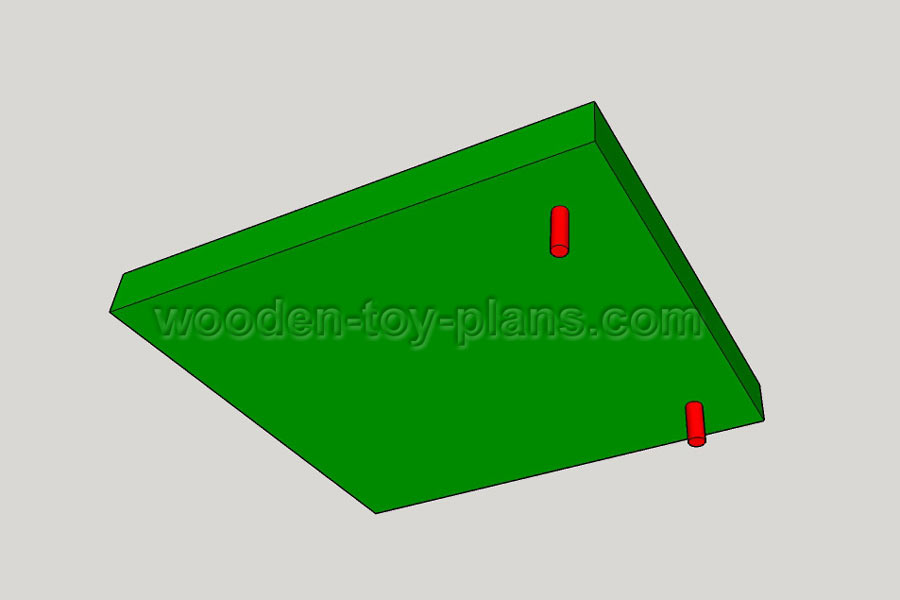
Showing the underside of the wheel making jig, with two dowel pins fixed in place.
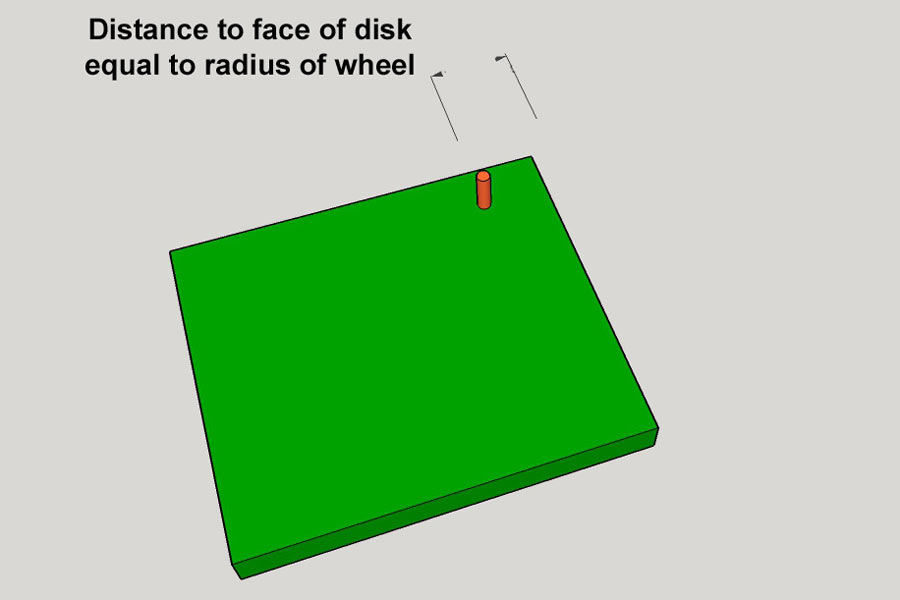
Once again the top of the jig, this time without the wheel to show the dowel. Measure the radius from the face of the disc to drill the hole. I use the same jig with holes at different radii for wheels of different sizes.
Note that the dowel is a press fit, not glued in place. To do this, I cut a slot in the dowel to make it easier to insert and remove without being too loose.
Woodworking Tip: Note that it is good practice to cut the slot in
the dowel along the grain and not across it.
Start by marking out the size that I want using a pair of
compasses. Sometimes I paste a paper template onto the work-piece.
Whichever works best, and the important part is to drill the hole for
the axle first.
Using a scroll saw, a band saw or even a jigsaw, I cut out the
disc as close to the line as possible trying not to touch it.
Place the rough cut disc on the dowel, it should be able to rotate
freely without too much slack.
Start the disc sander, place the jig on the table with the
underside dowel diagonally across from the wheel touching the edge of
the table.
This allows me to pivot the jig by applying gentle pressure
against the sanding disc and rotating the wheel at the same time. Too
much pressure and you burn the wheel.
Slow and gentle is best until you have turned a complete circle,
sliding the jig back and forth as you would with any other
work-piece.
Viola! You now have a perfectly round large diameter wooden wheel.
Not only that, you can make as many as you want and they will all be
exactly the same size.
Wooden toy wheels with treads
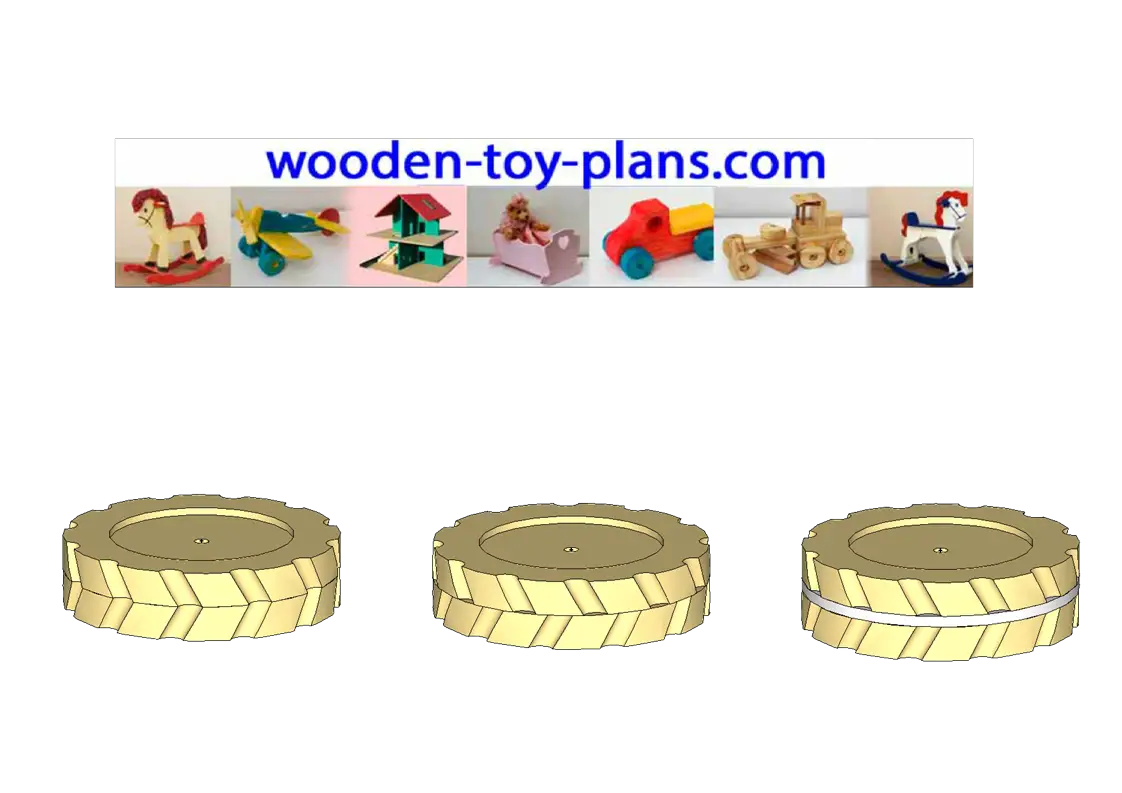
How to make wheels with treads, typically used in wooden construction toys.
The example shown is made using 19mm thick stock, and the diameter is about 150mm.
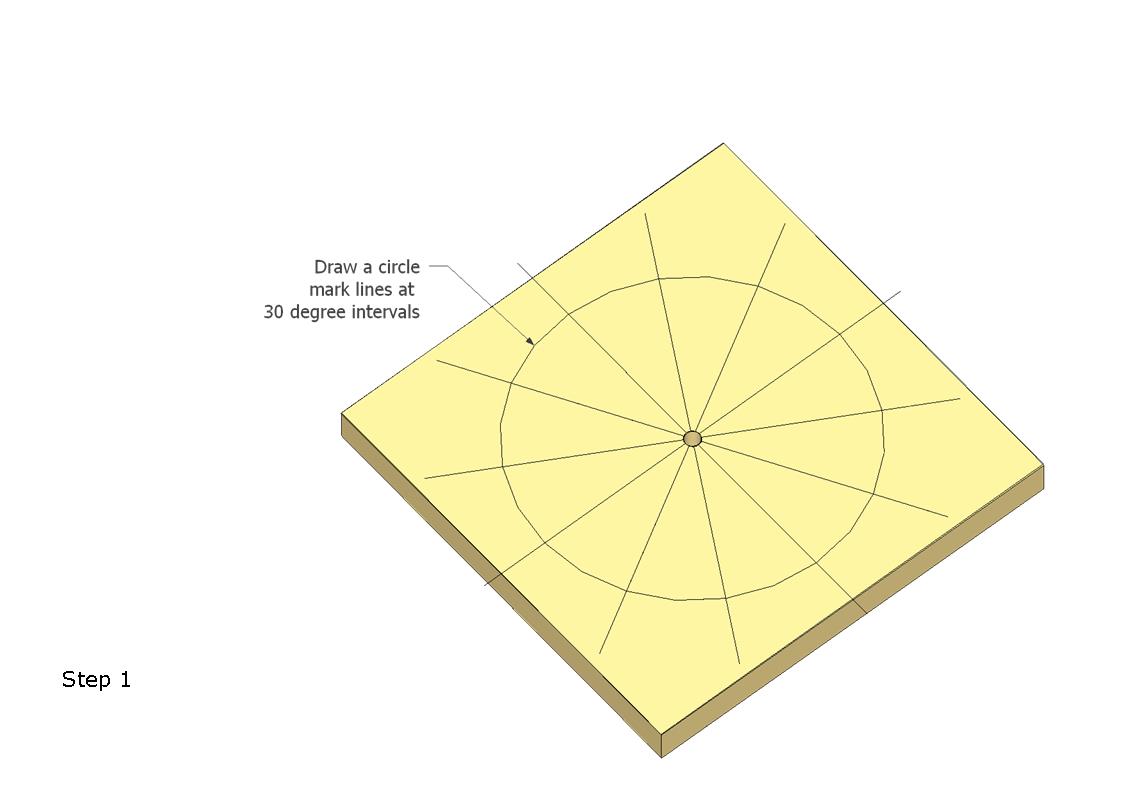
Step 1
Start by drawing a circle for the diameter of the wheel.
From the center, draw lines at 30 degree angles.
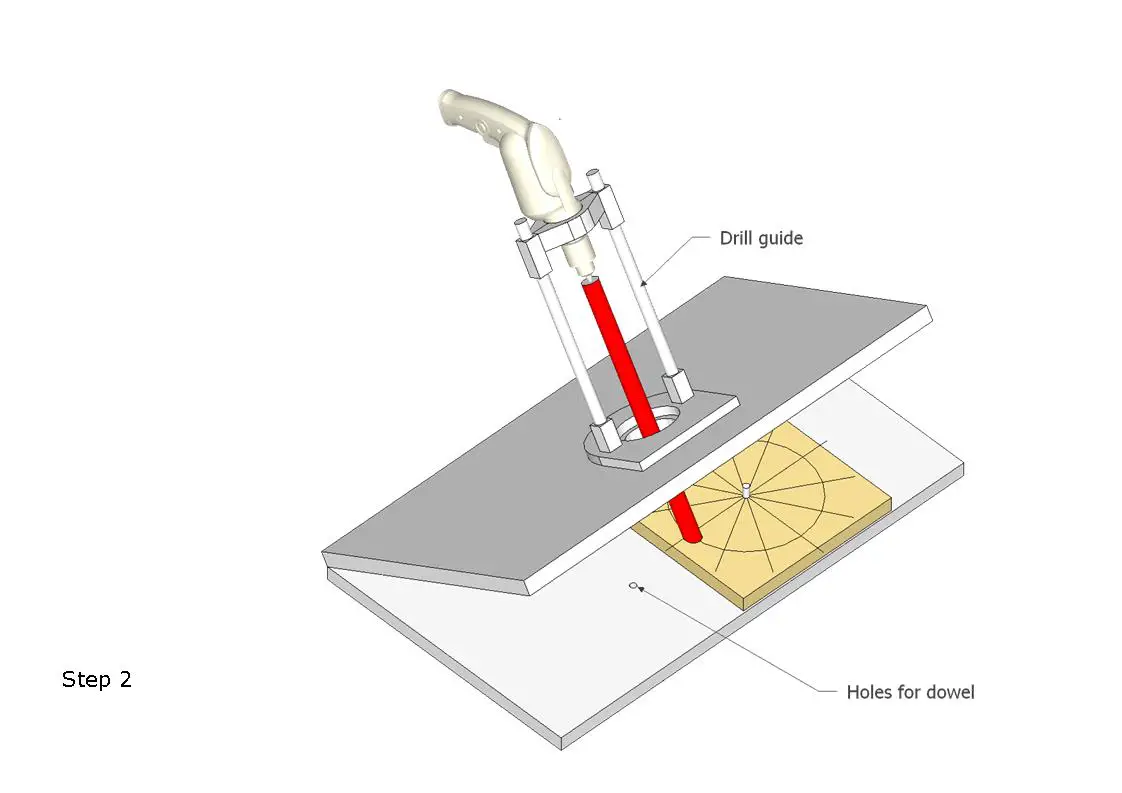
Using a drill guide mounted on a board at 30 degrees.
The base board has two holes spaced apart equal to the diameter of the wheel.
The workpiece is marked with lines at 30 degree intervals.
Here I’m using a 20mm drill.
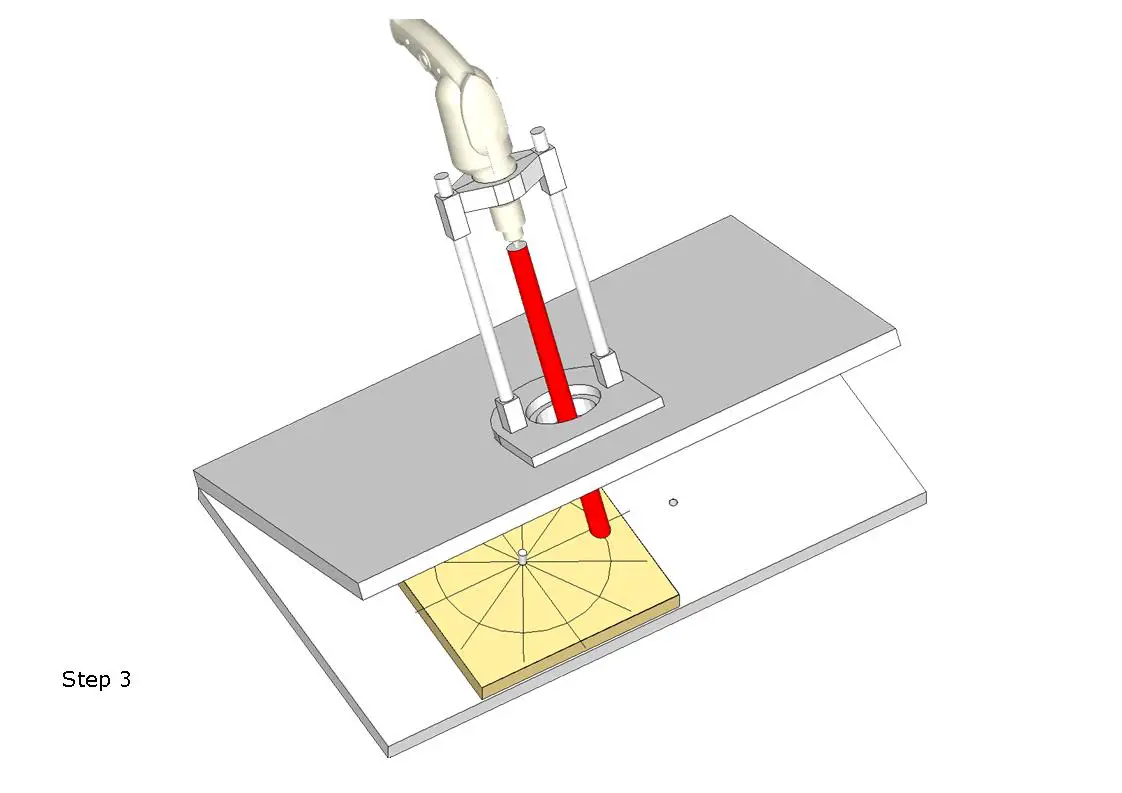
Here the second half of the wheel is made.
Note I'm using the second hole to drill the treads at the opposing angle.
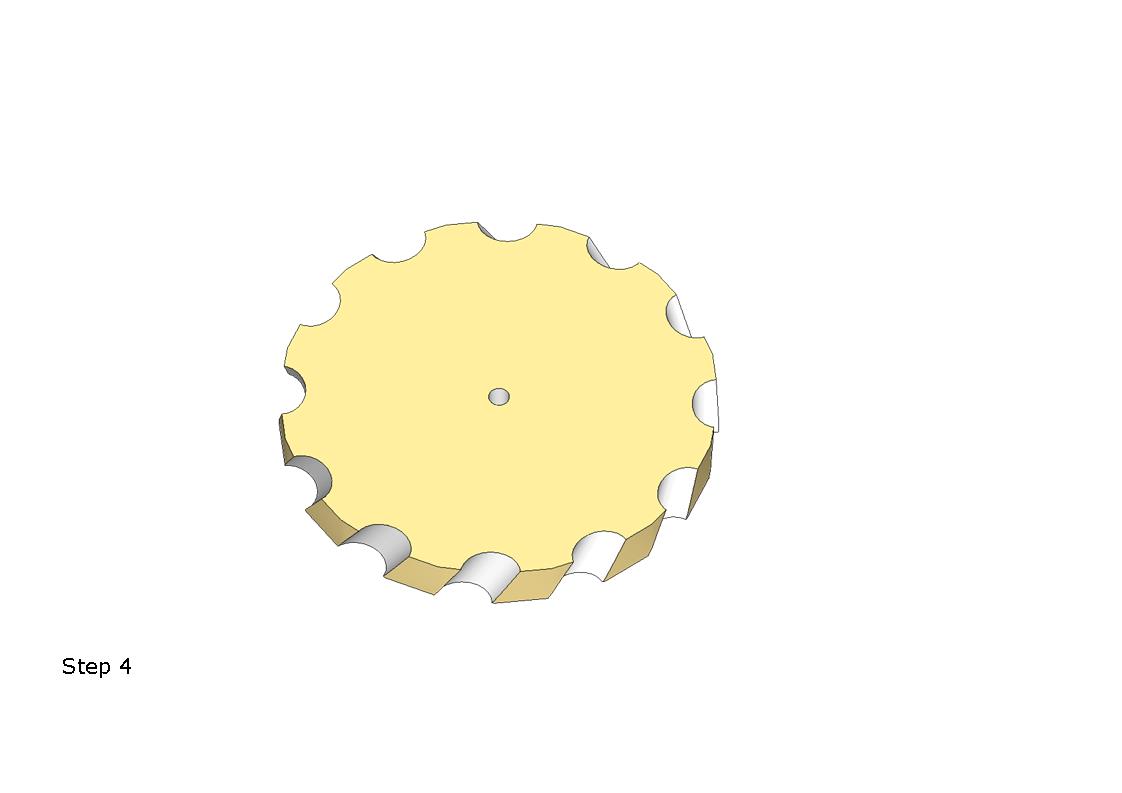
All the holes are drilled, cut along the circle and clean up with a bit of sandpaper.
Glue the two parts together and viola, you have a wheels with treads.
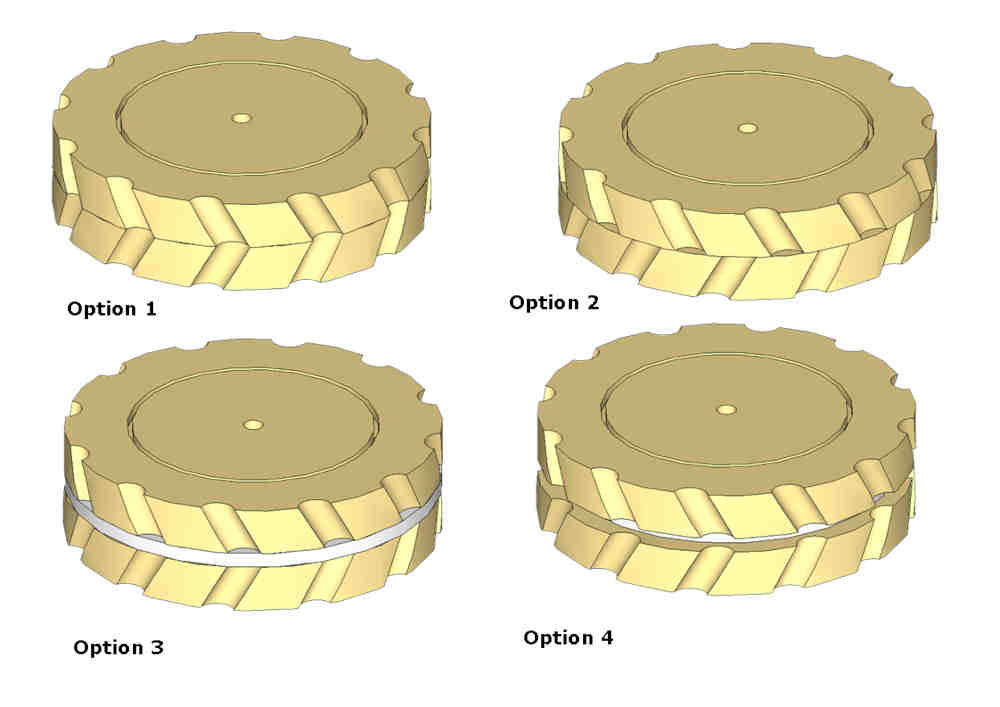
Option 1 the treads line up. This will work if the treads are accurately cut.
Option 2 the treads don't line up.
Option 3 insert a disc as shown.
Option 4 also a disc with a smaller diameter to form a groove.
More wooden toy wheels
How to make large wooden toy wheels using this very simple but effective woodworking jig.
Making wooden toy wheels - from woodwork forums, how to make wagon type wheels.
Spoke wheel jig for model makers, also from woodwork forums.
Tips & Tricks
A few things I have learned along the way.
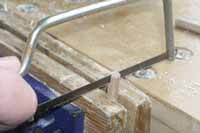
To fit the axle to the wheel I prefer a snug fit. To relieve the pressure on the wheel, cut a groove about 6mm (1/4") deep in each end of the axle. Make sure to cut along the grain rather than across it. Use a junior hacksaw.
Fit the axle to the wheel, with the cut in the same direction as the grain. This tip serves two purposes, it minimises the tendency to split the wheel, and provides a tiny reservoir for the glue.
Make washers from plastic milk bottles using a hollow punch. This will help to prevent the wheel rubbing against the body of the toy.
Apply candle wax to the area of the axle that fits inside the body of the toy.
How to turn your hobby into a profitable business.
Solo Build It! (SBI!) is an online platform that empowers solopreneurs to build profitable online businesses. For over two decades, SBI! has been trusted by members to turn their passions, hobbies, or skills into successful ventures. Recently, the introduction of ChatGPT has ushered in a new era of AI-assisted content creation within SBI!.
Allow me to introduce you to Tai, your business-building AI assistant. Tai is now available in SBI! and can help you navigate the world of online entrepreneurship. Whether you’re a complete beginner or an experienced solopreneur, SBI! provides everything you need to create an income-generating website or blog.
Here are some reasons why starting an online business with SBI! and Tai is a great choice:
- Adaptable Lifestyle: Building an online business adapts to your desired lifestyle. Enjoy newfound freedom without being tied down to another job.
- Low Startup Costs: You don’t need significant capital to begin. All you require is a computer, internet access, a roadmap, and an affordable platform like SBI!.
- Flexibility: Work as much or as little as you want, wherever you choose. Once you’ve built a solid foundation, you can earn money even on days you don’t actively work.
- Portability: Take your business with you, especially if travel is part of your retirement dream.
- Global Impact: Help people worldwide by sharing your knowledge and expertise.
- Continuous Learning: Running an online business keeps your mind active and energized.
SBI! combines education, tools, and a proven process to give you the highest chance of achieving your financial goals. Whether you’re aiming for financial independence or simply want a rewarding project during retirement, SBI! can guide you.
If any of this resonates with you, I invite you to explore SBI! and discover how it can help you build your online retirement business. Even if you’re a beginner, SBI! provides the resources you need to succeed. Say hello to Tai and embark on your entrepreneurial journey! 🚀
Learn more and try Tai for free on the Solo Build It! website.
